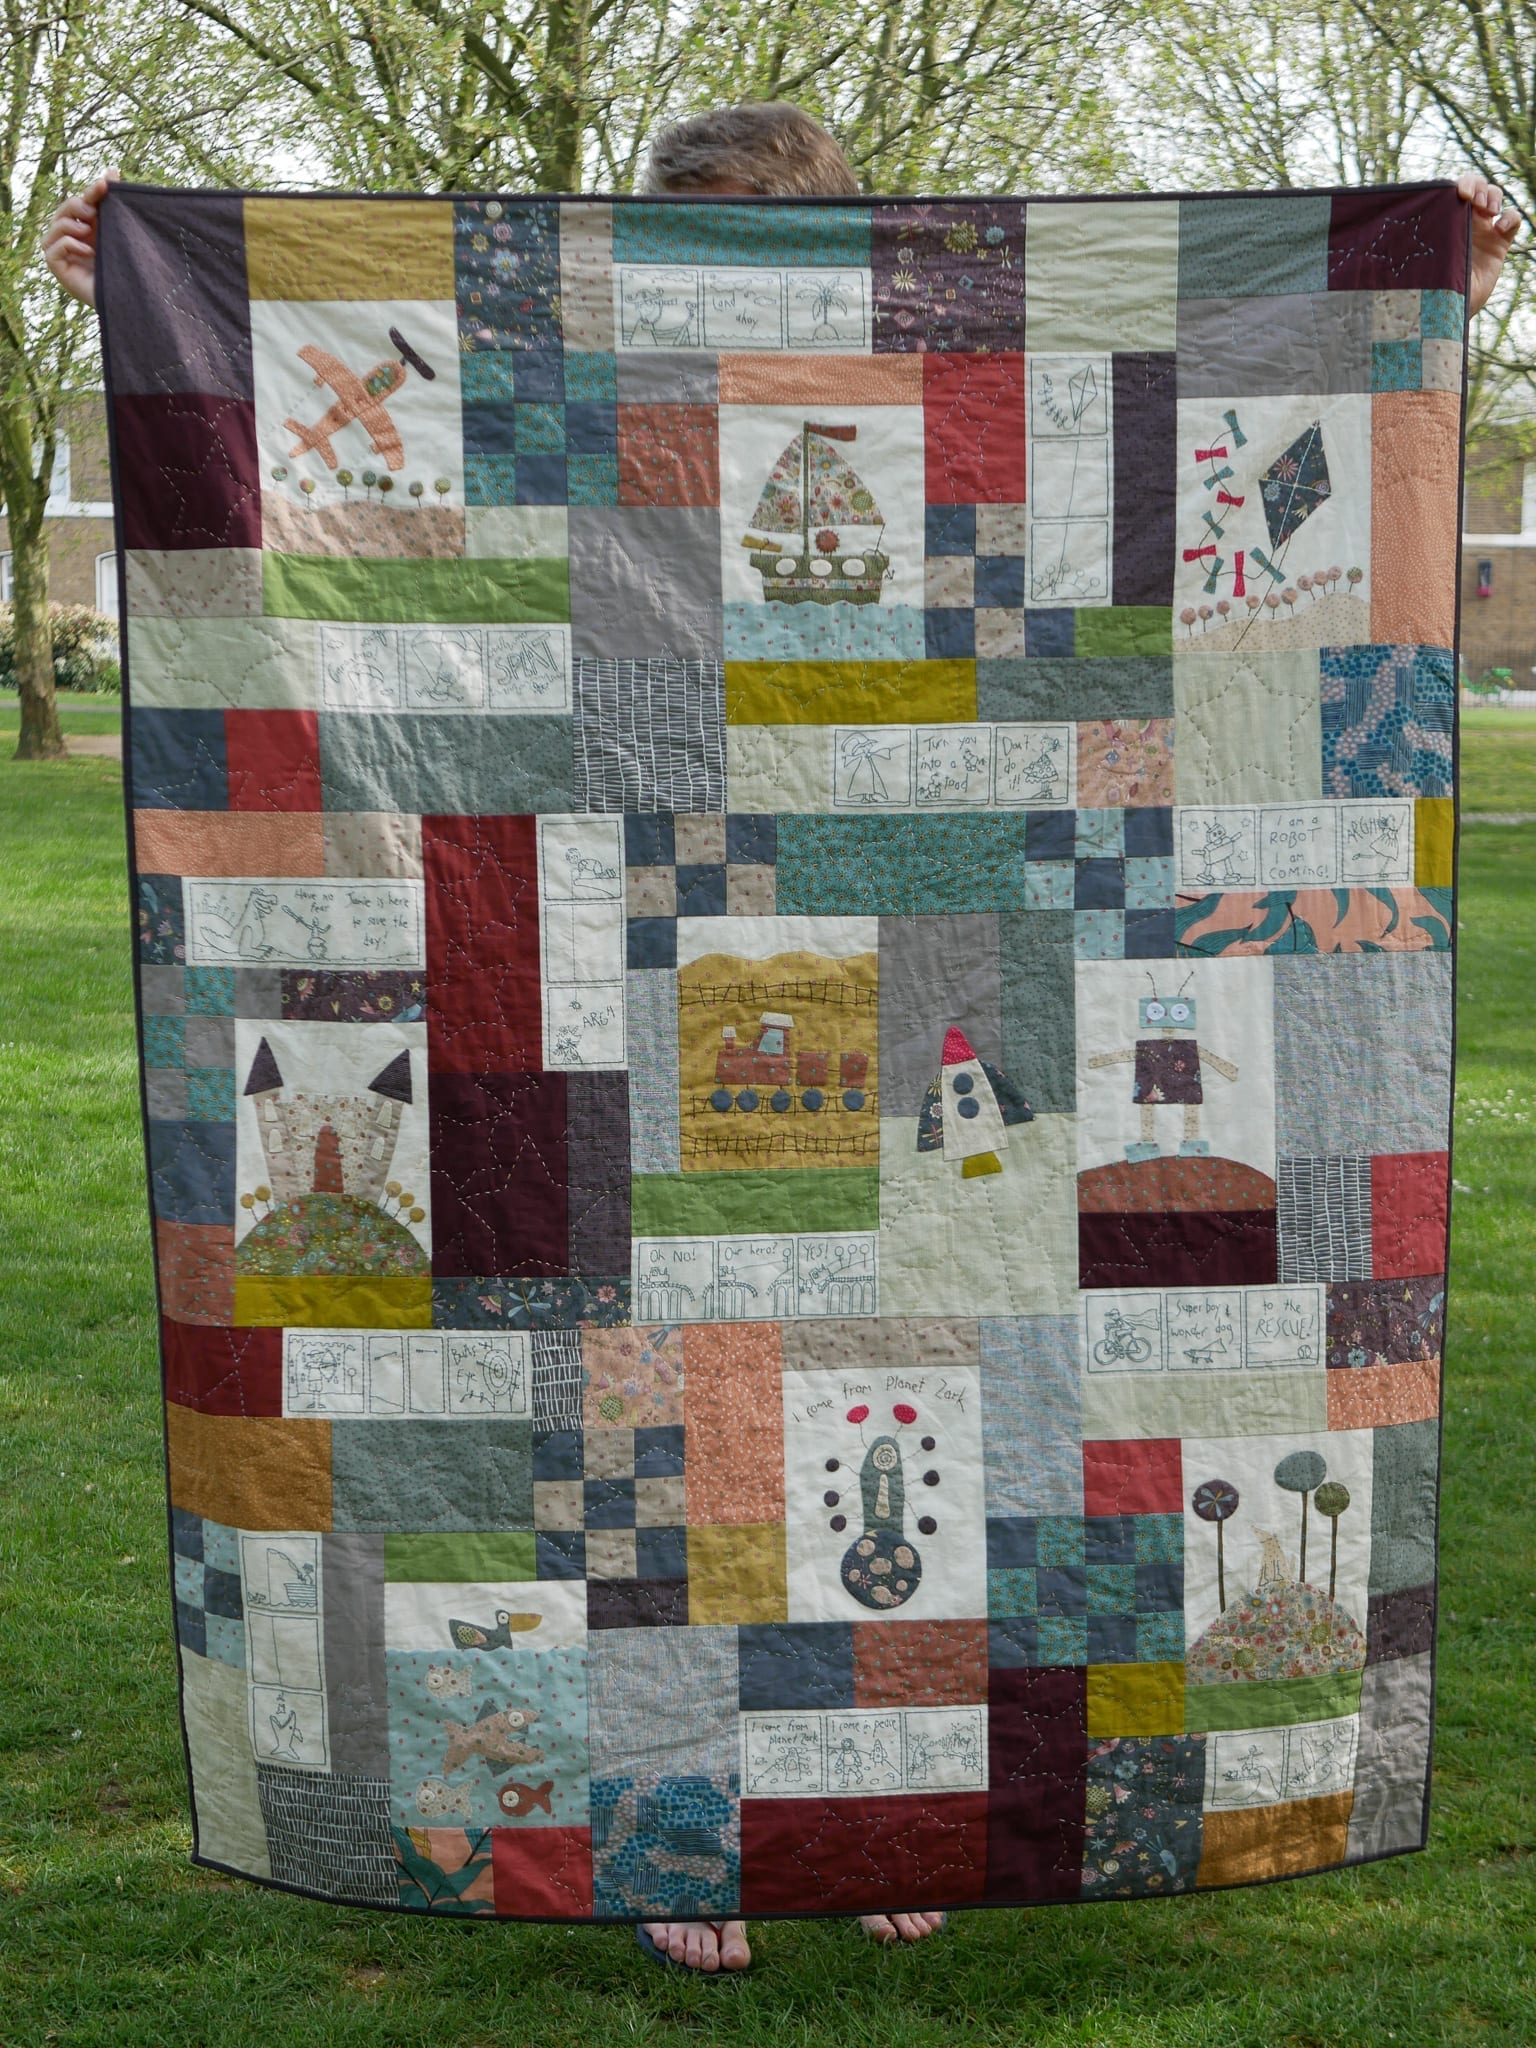
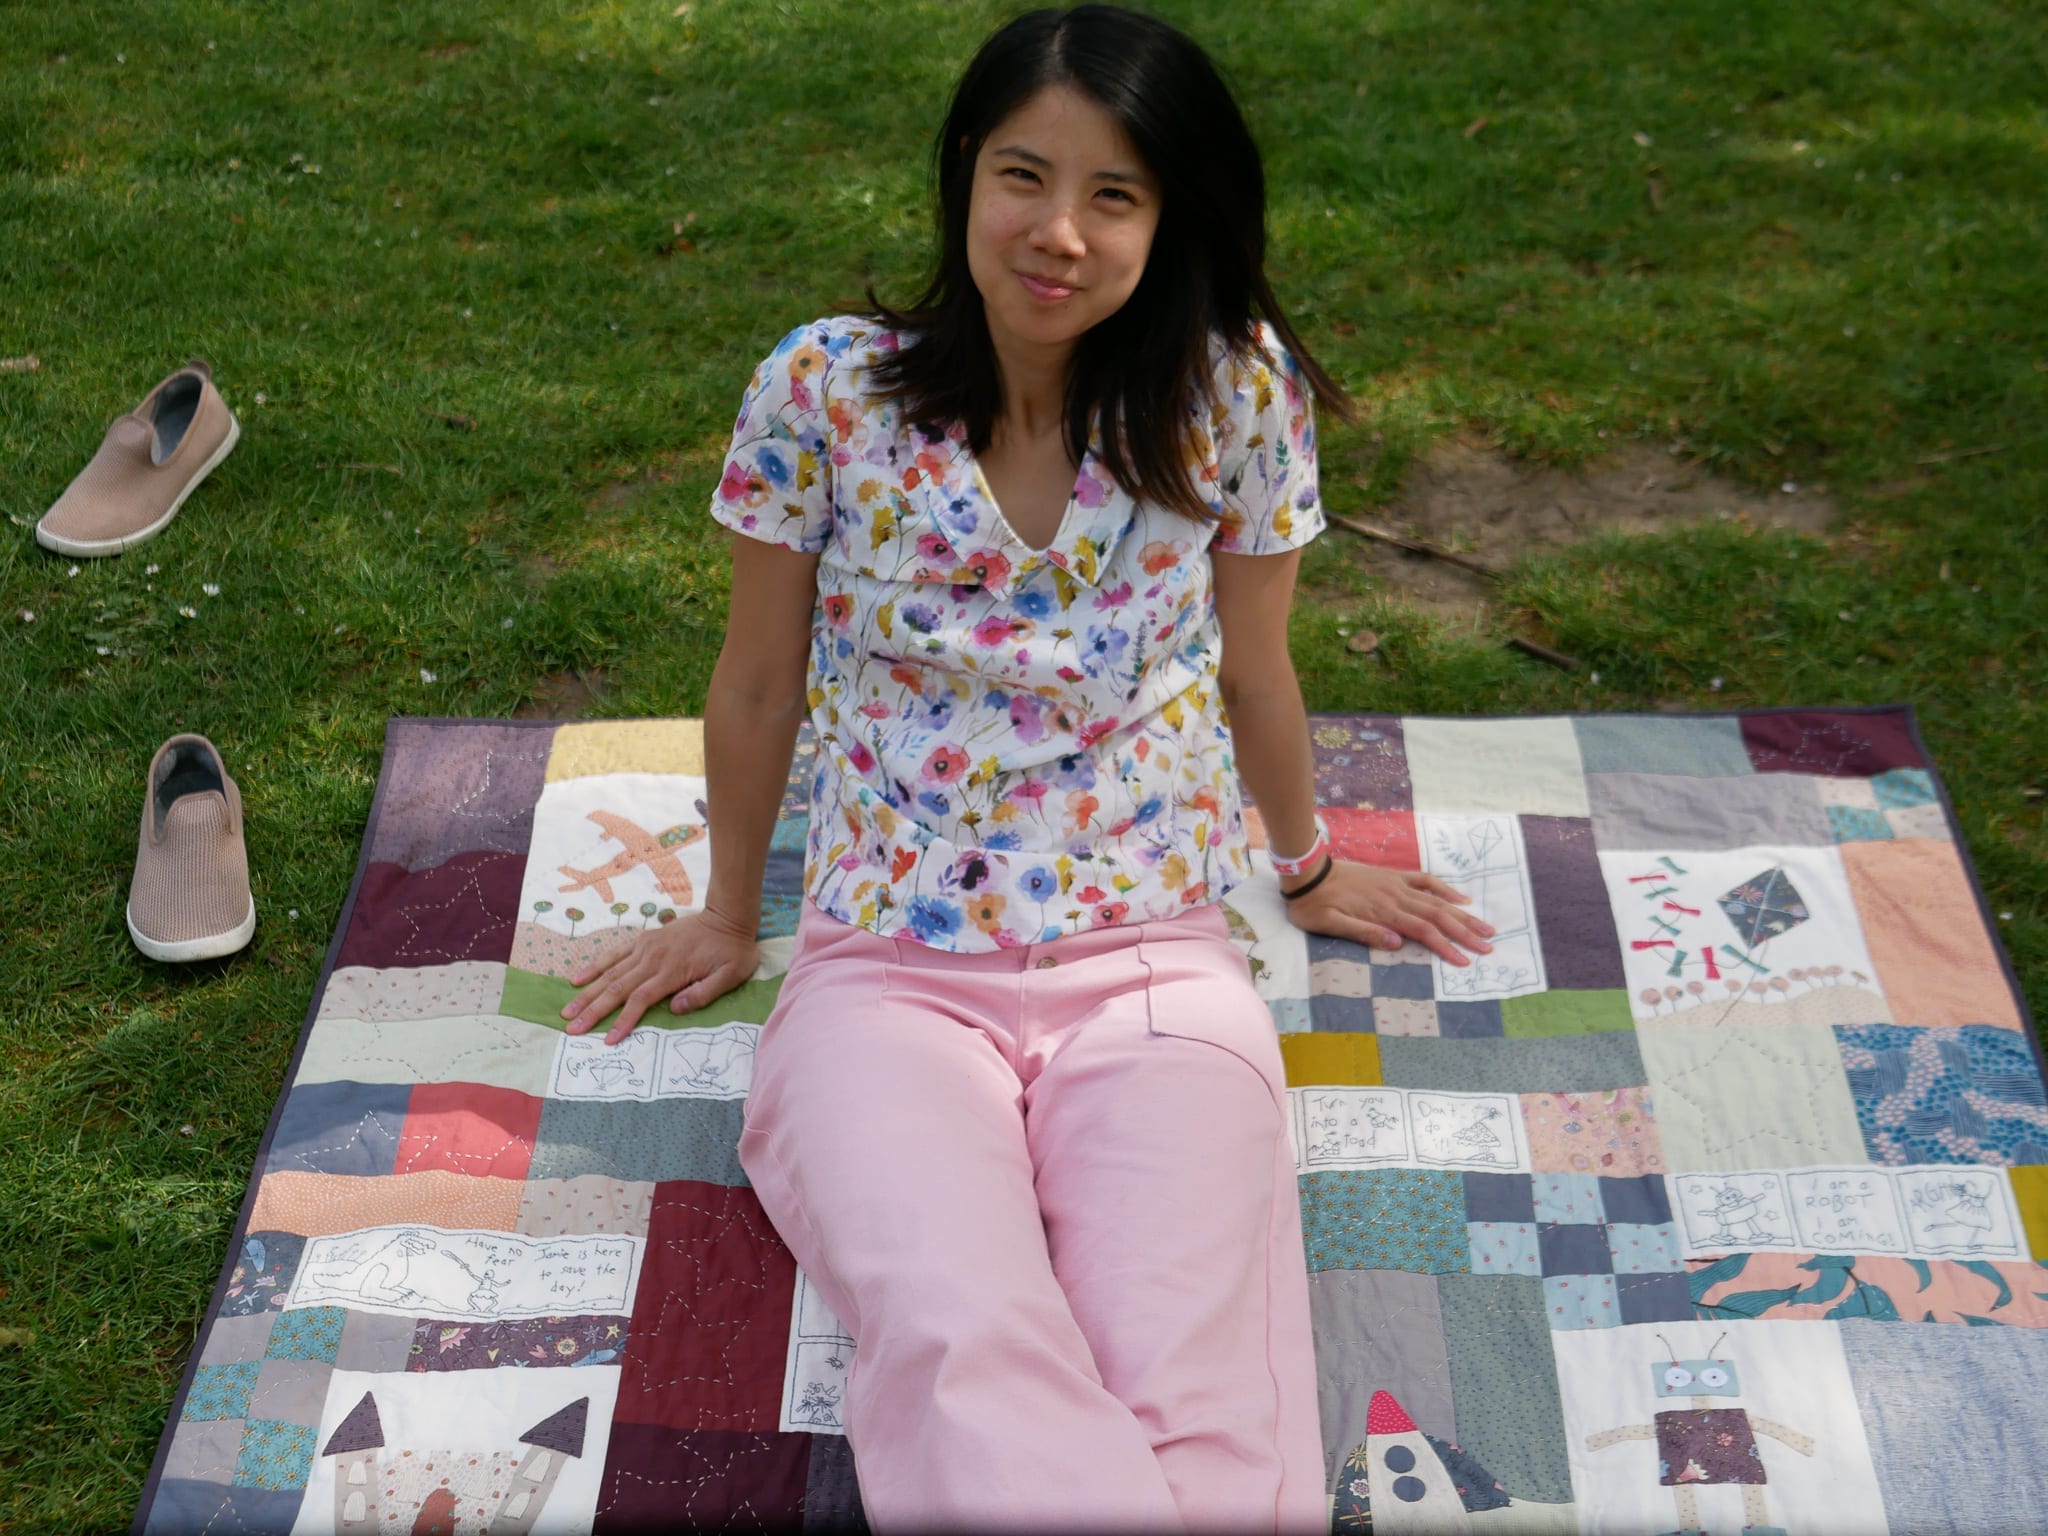
Do you make quilts? Today I’m sharing the first quilt I ever started, and the first one that was made solely by me. As it was for my son I was quite determined not to get any help from a professional long arm quilter to do the actual quilting or even baste the layers together for me (not to mention I might have had a mental breakdown if it got lost in the post). If we’re thinking about slow: this quilt took 2 years and the sheer amount of work means I’m putting this in heirloom quilt category. Read on for the gritty details.
As a newbie quilter when I began, I bit off way more than I could chew! This went from being a labour of love when I started; to being pure labour by the end of it. I surprised myself that I’m still into quilting despite this project but I’m so pleased with the end product. (note! Quilting is a completely different discipline to dressmaking. Here’s my quilting 101 for dressmakers.)
The quilt pattern and fabrics
There’s a quilt shop in the most unexpected place in the middle of rural New South Wales in Australia, 3.5 hours drive west of Sydney. You might have seen their fabric and pattern range, it’s Hatched and Patched by Anni Downs. The style is vintage country and my friend gifted me a giant fat eighth bundle. Whilst we were at the shop there was a sample of The Boy’s Story quilt. I fell in love with it and decided there and then to make it with the fabric gift.
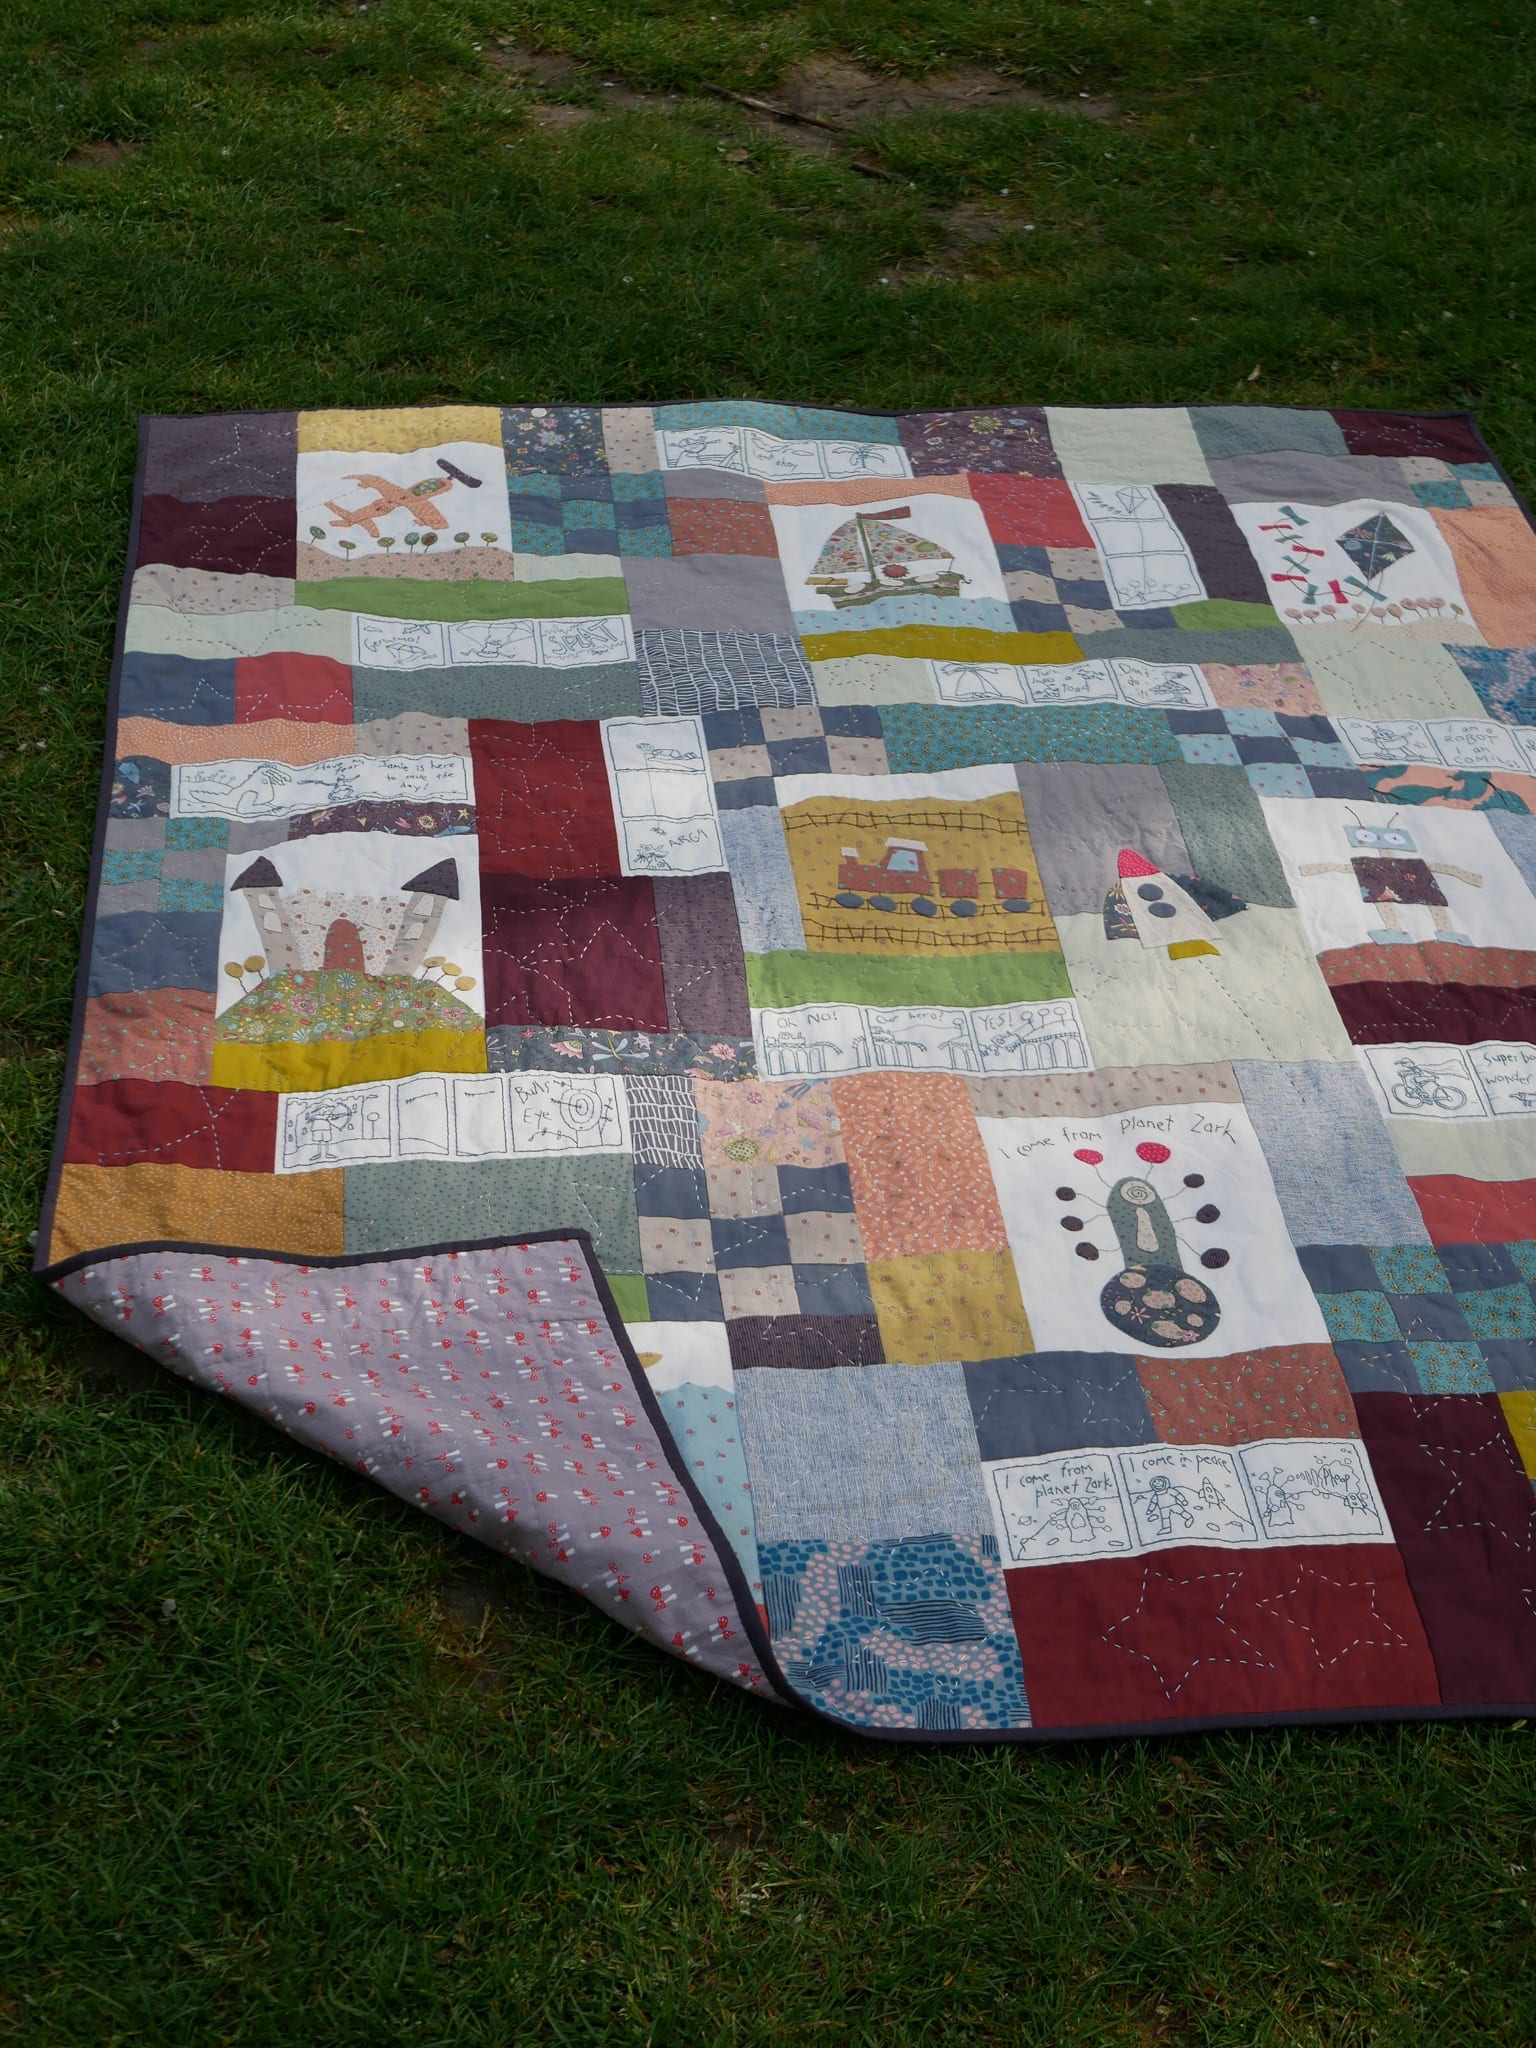
At some point I discovered there wasn’t enough in the fat eighth bundle to make the whole quilt (and that would have been boring anyway) so I used a random mix of stuff from my stash for the filler rectangles and squares. By then I had accumulated leftovers from making my sister’s quilt as well as my stash of woven cotton leftover from dressmaking. The backing and binding I got after finishing the top; it’s from my London go-to quilting shop The Village Haberdashery. It was worth the trip; in cases like this with multicolours there is no substitute for seeing fabric in person. The baby toadstools on the back are so cute and I think the colour also goes pretty well with the top. The binding is dark charcoal with a purply undertone.
The quilt pictures and cartoons
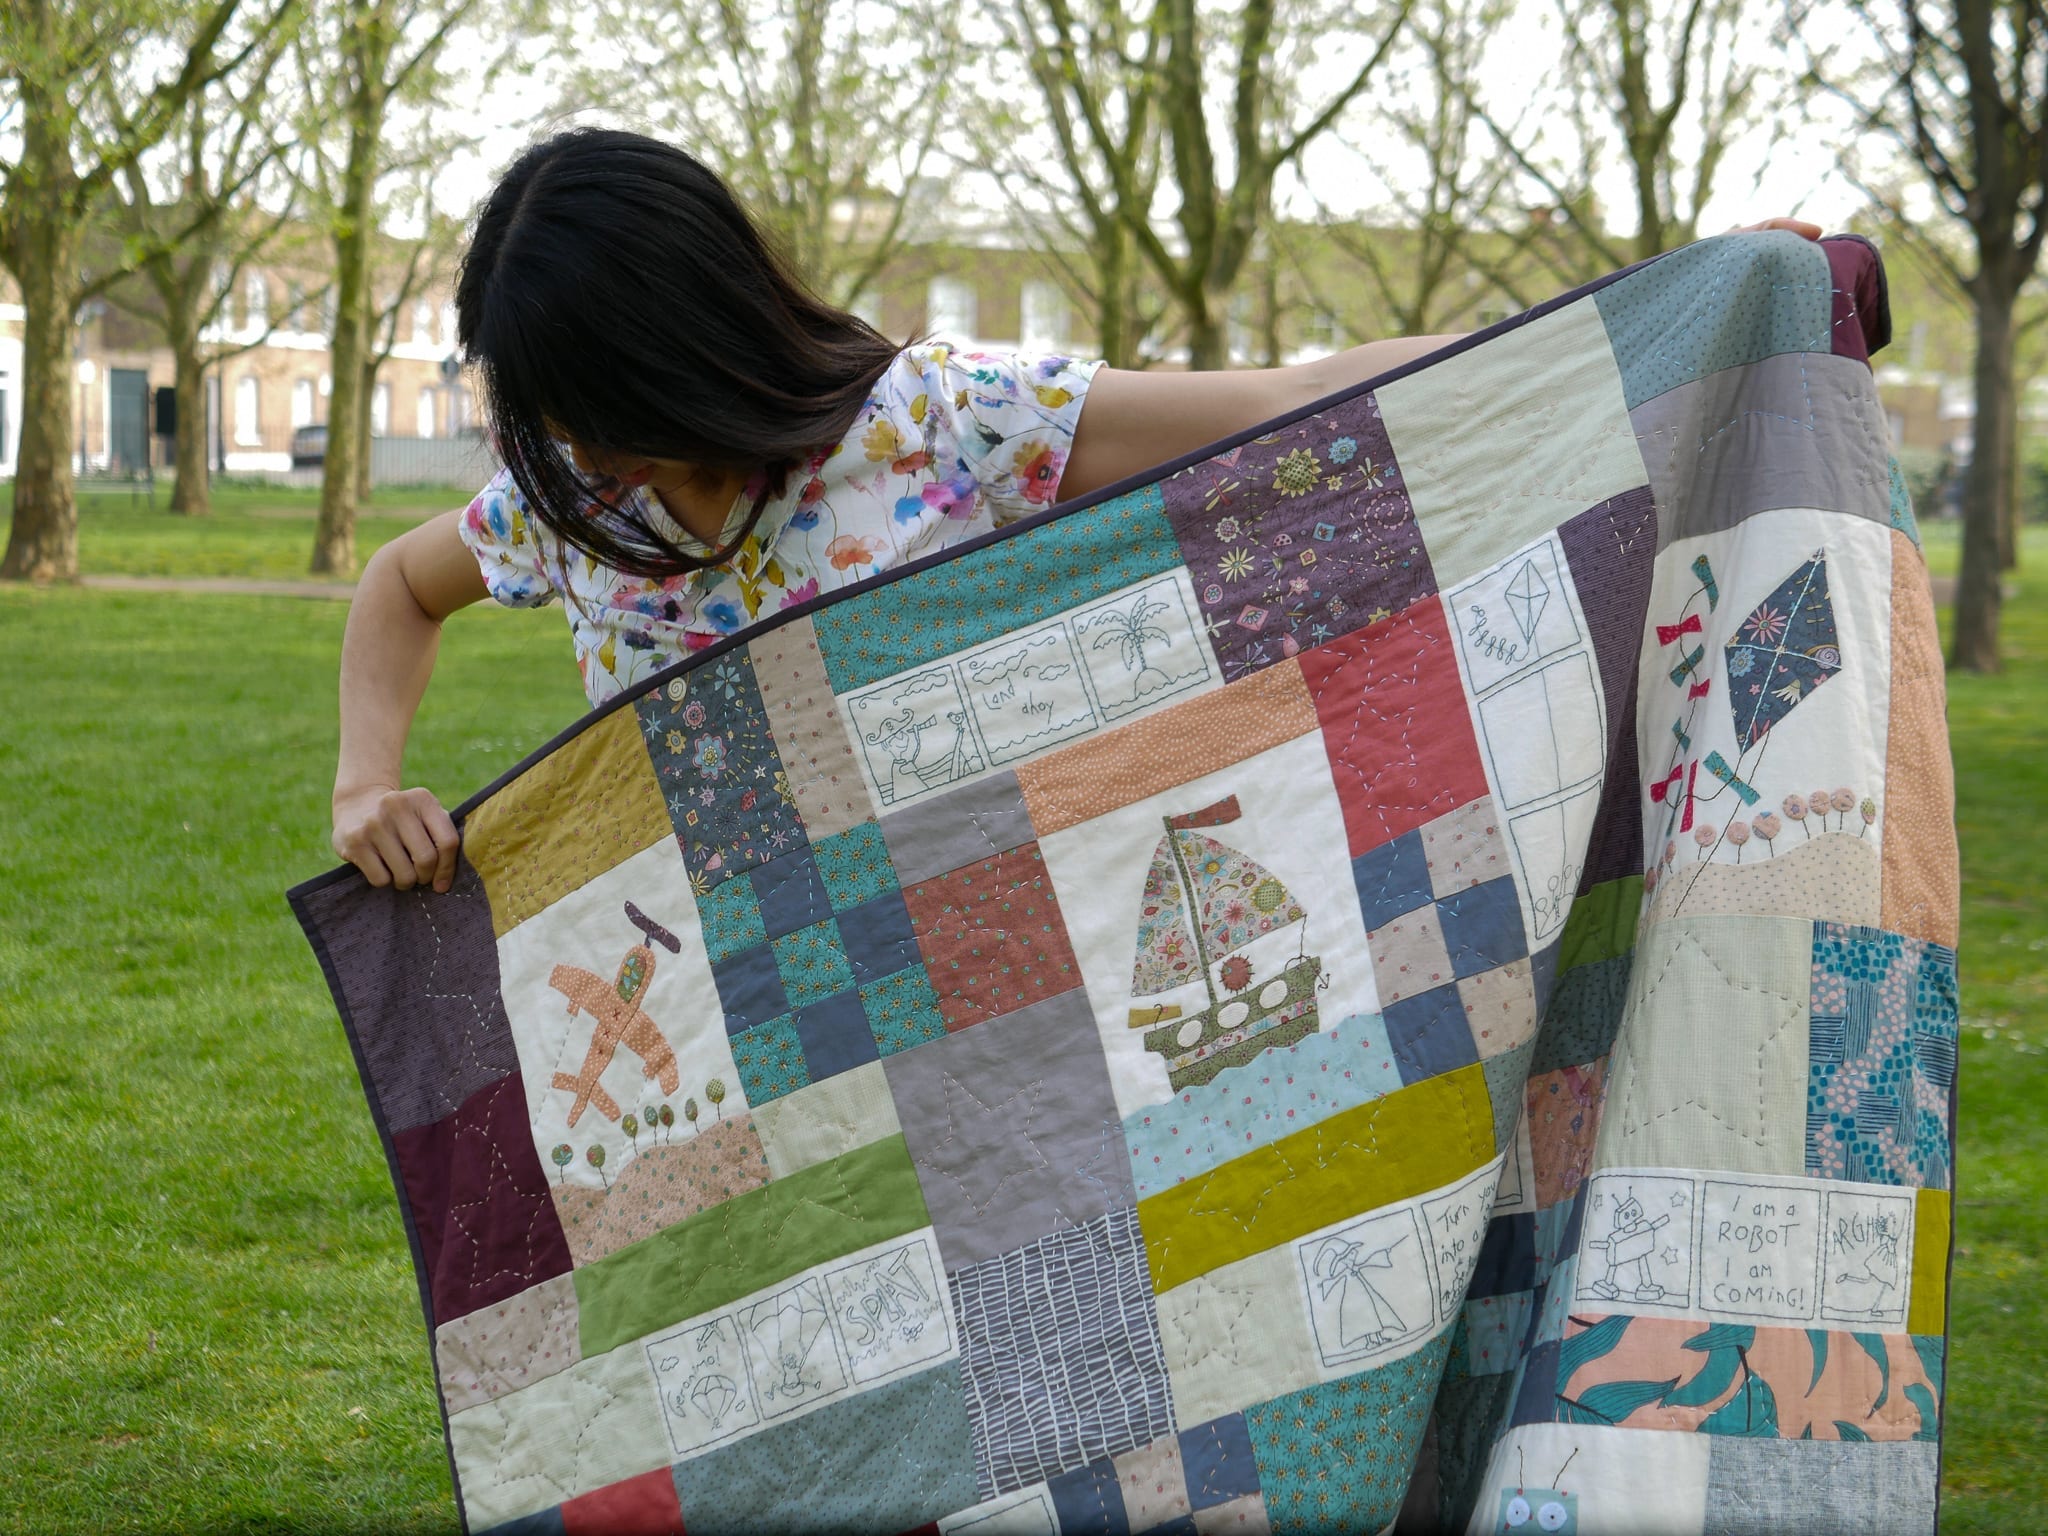
I used leftover calico from dressmaking toiles as the background fabric for all the pictures and cartoons. It took me 1.5 years to backstitch the pictures on the cartoon strips and the appliqué pictures, including holiday sewing.
The Cartoon strips are entirely hand sewn with a backstitch and 1-3 strands of embroidery floss. I traced the pictures on the fabric with a lightbox and a pigma pen, then stitched over the top. Unfortunately, I finished half the strips before I learned the pen technique. Could have saved myself a lot of squinting and dodgy pencil tracing marks had I bothered to google “redwork” before that.
There are many ways to appliqué
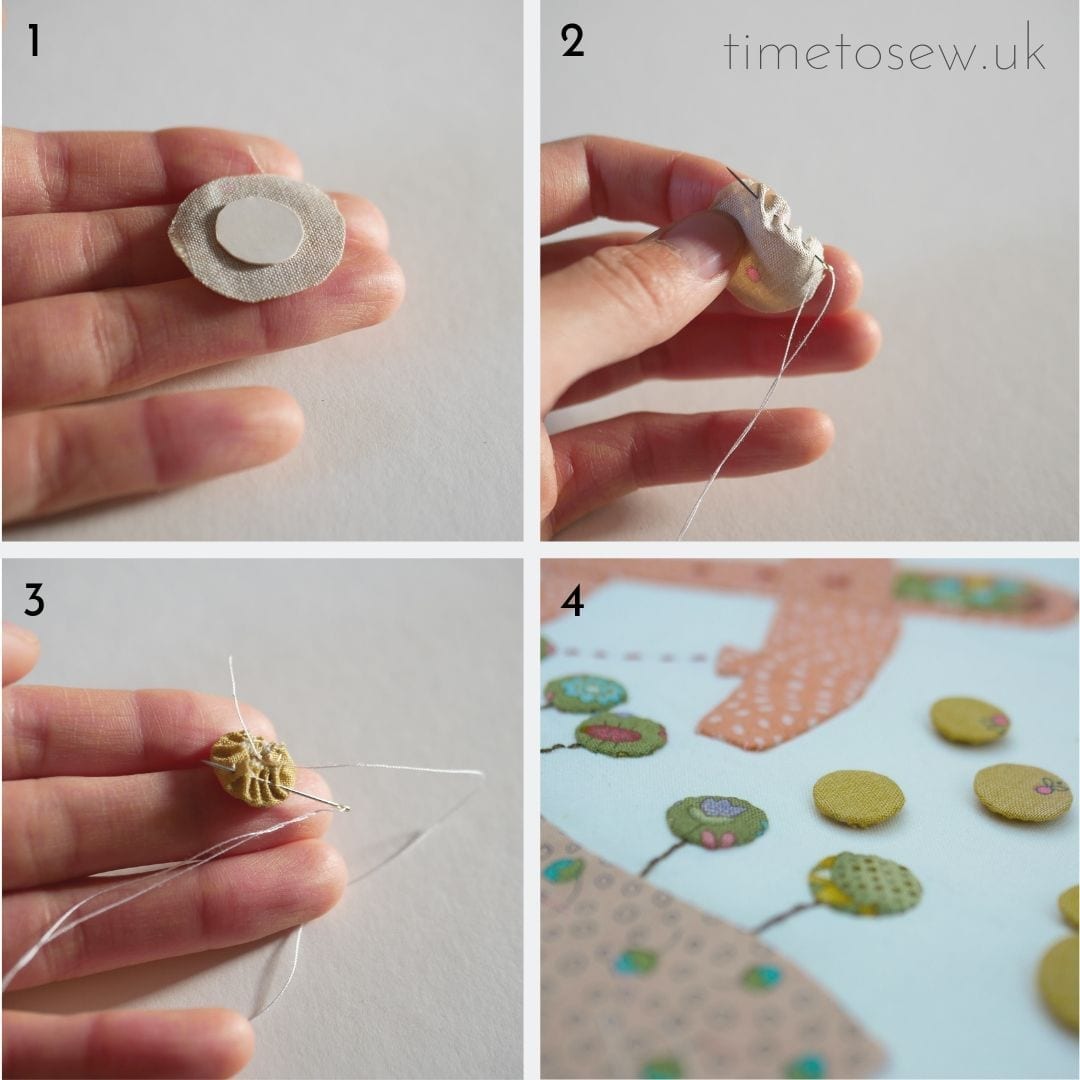
8 of the 9 appliqué picture panels are done by needleturn. This is tucking under the raw edge (seam allowance) of the shape you are attaching to the background, whilst you whipstitch the shape in place. Probably better I demonstrate with how I made the circles here on the airplane panel.
First, cut a circle in the size you want from cardboard, then cut fabric in the same shape but 1/4″ – 1/2″ bigger. Second, make tiny gathering stitches with a hand sewing needle. Third, pull on the gathering stitches so the fabric wraps around the cardboard circle, then turn over and press with an iron. The yellow finished circles are in picture 4 (I already whipstitched down the green ones).
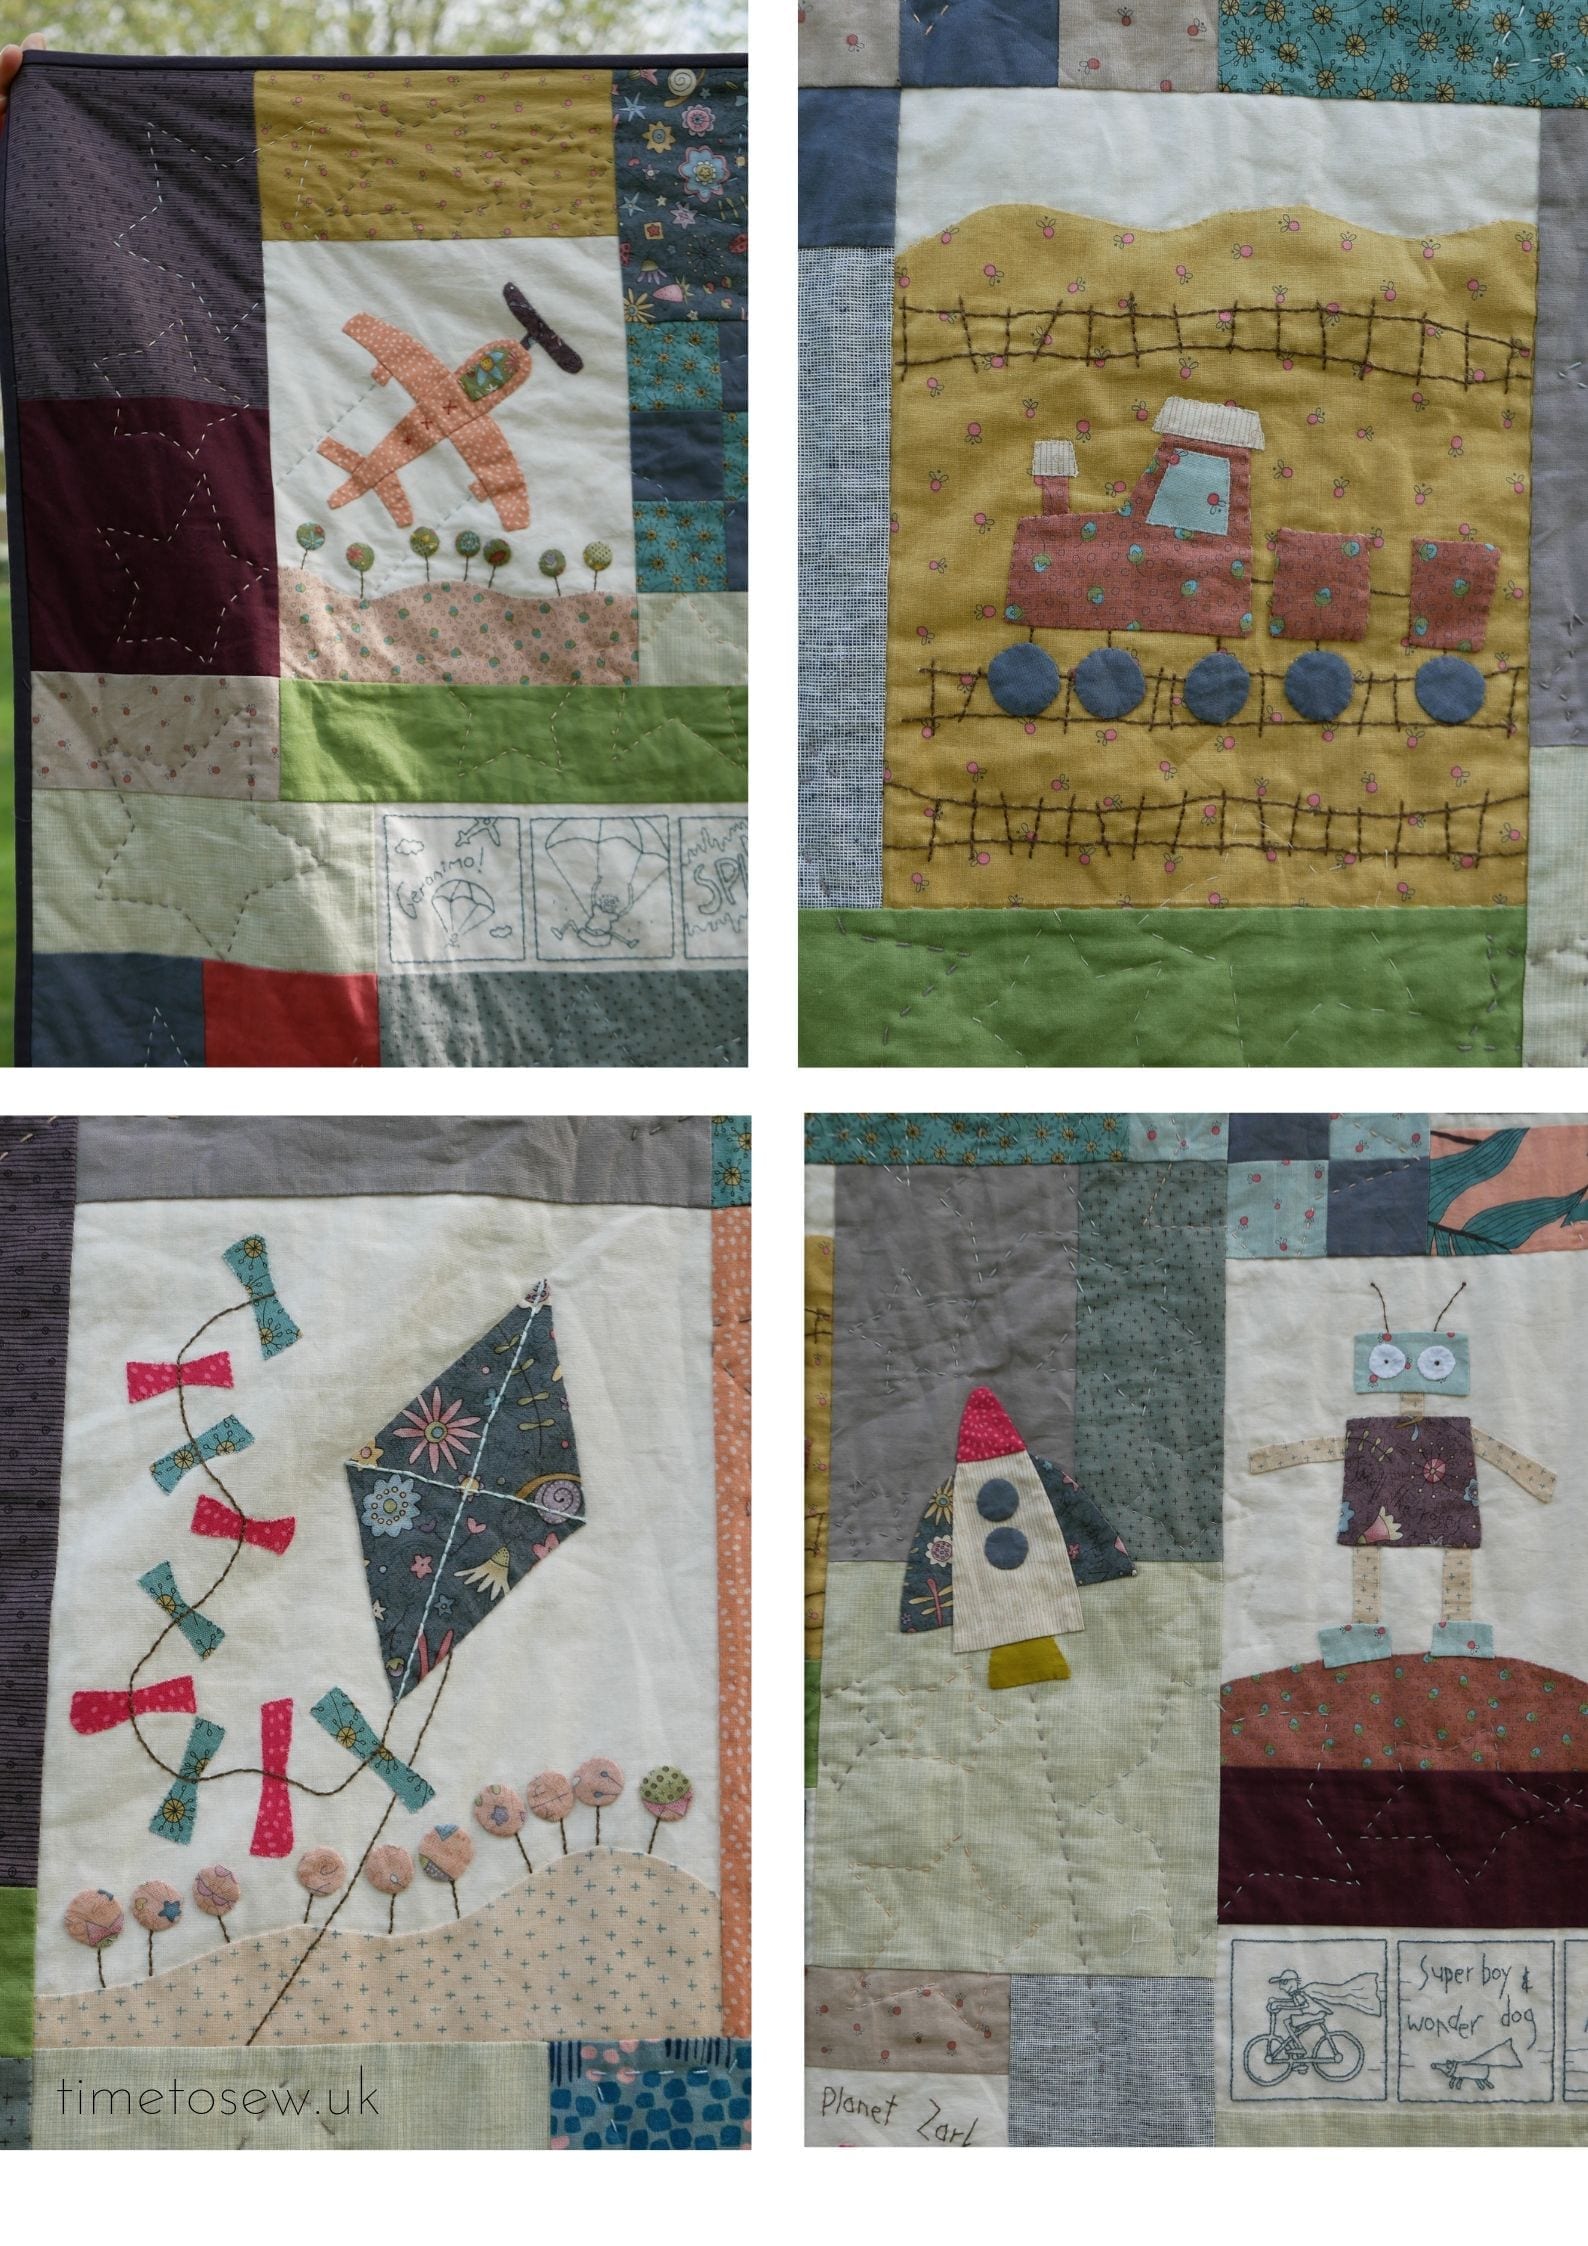
Most of the panels I did with needleturn which I described above. But in the kite panel (see pic below) I used the raw edge appliqué technique for the ribbons as the corners and curves were beyond my needleturn skills. Raw edge applique means applying the shape to the background using double sided interfacing (commonly called fusible web). Same kind of concept as using double sided tape to stick two bits of paper together. After you fuse the shape to the background with an iron, you machine stitch around the edge of the shape using invisible nylon (or polyester) thread with a zig zag stitch. It doesn’t give a soft finish like needleturn as the invisible thread feels like fishing line, but it does hold together.
The quilting
There was no real possibility that I was going to machine quilt this. I didn’t want the quilting to take centre stage over the pictures and cartoons, and I’m also really bad at machine quilting without puckering.
The hand quilting I did is called “big stitch” quilting. This is hand sewing a running stitch through all the layers. You can see it in the picture panels above with the rocket and the robot; I quilted stars all over the quilt. I used a thick thread (perle 8 cotton) to keep the stitches visible.
On the pictures and cartoon strips, I also did big stitch quilting around the edges, purely so the quilting wasn’t too far apart. Because I didn’t want it to be really visible I used regular machine thread that matched the calico.
… and now that it’s finished?
One part of me wants to hang up the quilt and keep it in pristine condition. But that’s not what I made it for (I admit I took it outside purely for the photos) and it is such a joy to see my son really enjoying his quilt. He likes to take his rubber duck from the bath and show me that he knows the rubber duck is the same as the duck on the picture panel. He shouts choo-choo! when he points at the train picture and makes a whooshing noise when he looks at the plane picture. It also makes me happy to look at this quilt and have so many lovely memories of my home and family.
To be honest I feel slightly empty now that the mega project is done. There are many other projects on my list though so I’m sure the gap won’t be around for long. In the meantime, I’ll leave you with a couple more pictures from the photoshoot, just because this is really my proudest sewing make. If you are thinking about making this kind of thing and have any questions about the techniques let me know!
Till next time,
Kate x


10 comments
You’ve done a beautiful job. The star quilting looks awesome
Thank you, I’m really pleased with the stars! Better than in the ditch quilting for this one
Oh wow! The quilt is gorgeous! No wonder you feel very proud. Well done for perservering with it. XXX
Thanks Linda, my sewing endurance has never been tested like this before so I’m glad I made it!
Beautiful quilt. And yes it is truly an heirloom. Thank you for sharing the process and pictures.
Thank you Diane. I hope that the process / pictures will be helpful to someone who is thinking about such a quilt!
Wow, Kate your finished quilt looks absolutely amazing and I’m sure your little one will totally love it and cherish it!
This quilt is beyond amazing! All the details! The hand stitching! The colours and textures! The meaning and love behind it! The years spent. The quilted stars are brilliant, the cartoon strips are so fun. And true to your values, you incorporated remnants and scraps into it, with great results. I’m sure your son will love it now, and even more so later when he understands how much effort had gone into it. What a masterpiece, Kate!
Wow, that is fabulous!! You should be very proud of yourself and you son will love it forever!!
Thank you very much Trish!