The Terra pant by Pattern Fantastique has been re-released and I used the Top Down Centre Out method to fit it. I have many things to say on both, so let me dive straight in!
Terra pant pattern
Firstly, these have been redrafted so the pant is almost a brand-new pattern. You can read about what changed in Pattern Fantastique blog post here. I didn’t sew the original pattern, but in theory I prefer the idea of a high-waisted and neat silhouette compared to oversized and slouchy (the old version), especially with this kind of balloon shape.
My “good to know” list for the Terra pant
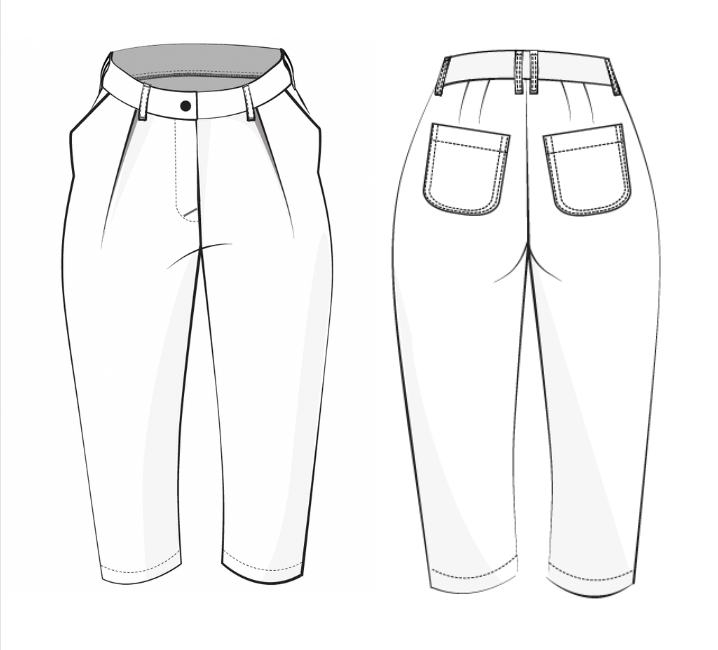
- There are facings on both pocket pieces (knuckle side and palm side) – love!
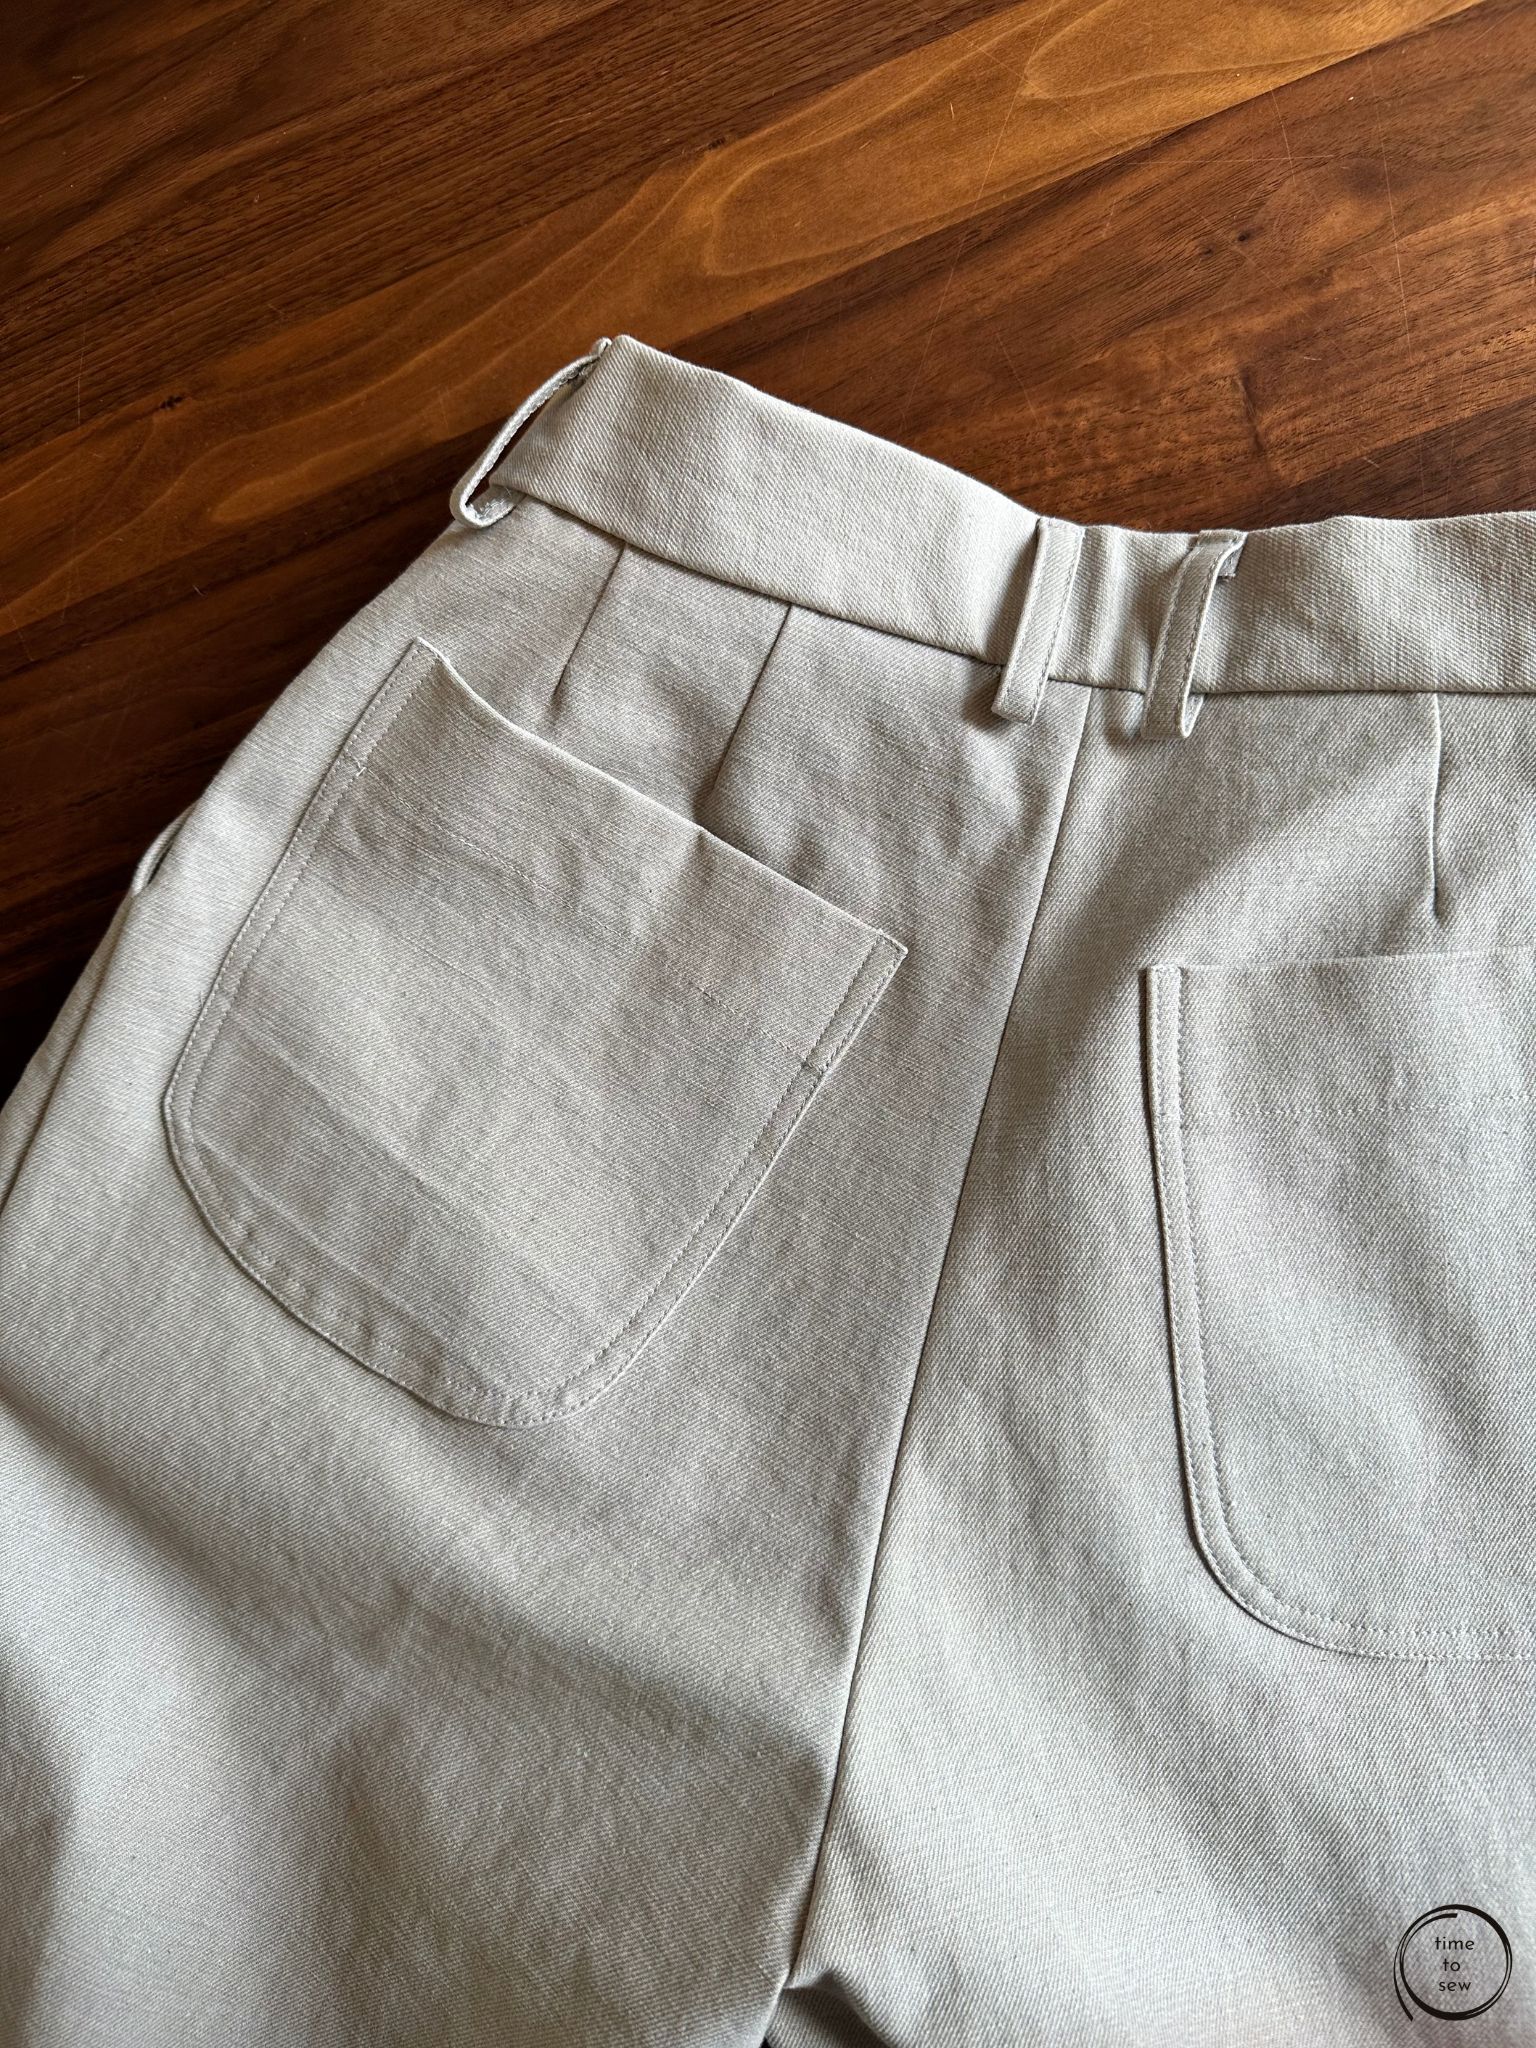
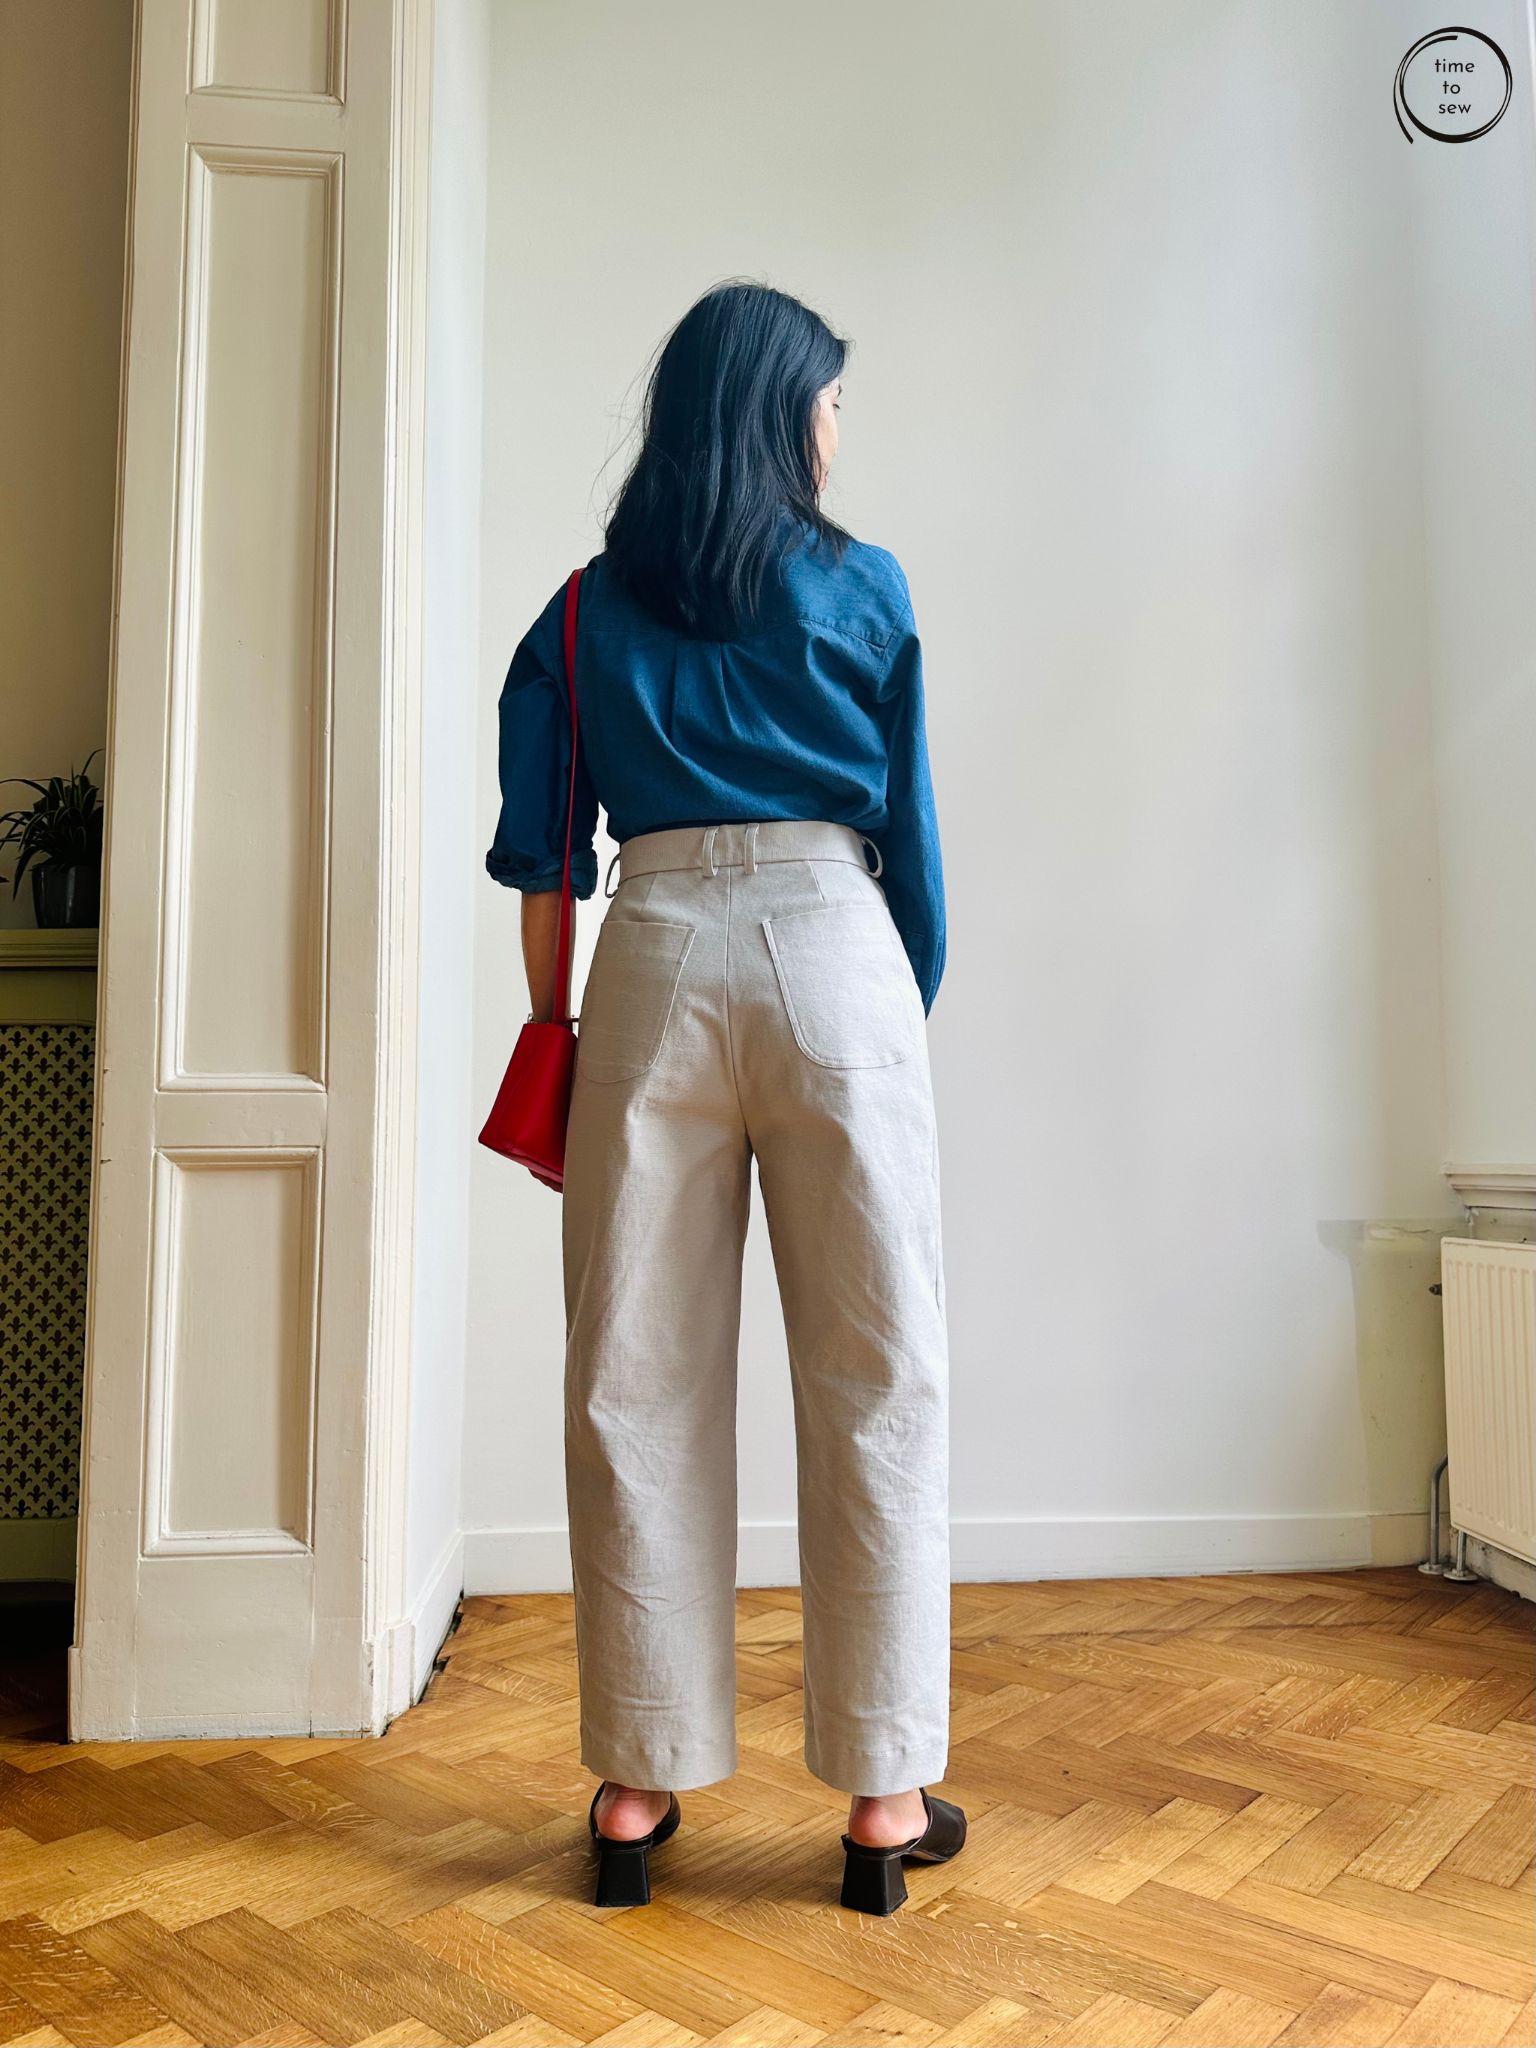
- Patch pockets on the back are a really good size and were in the right place for me.
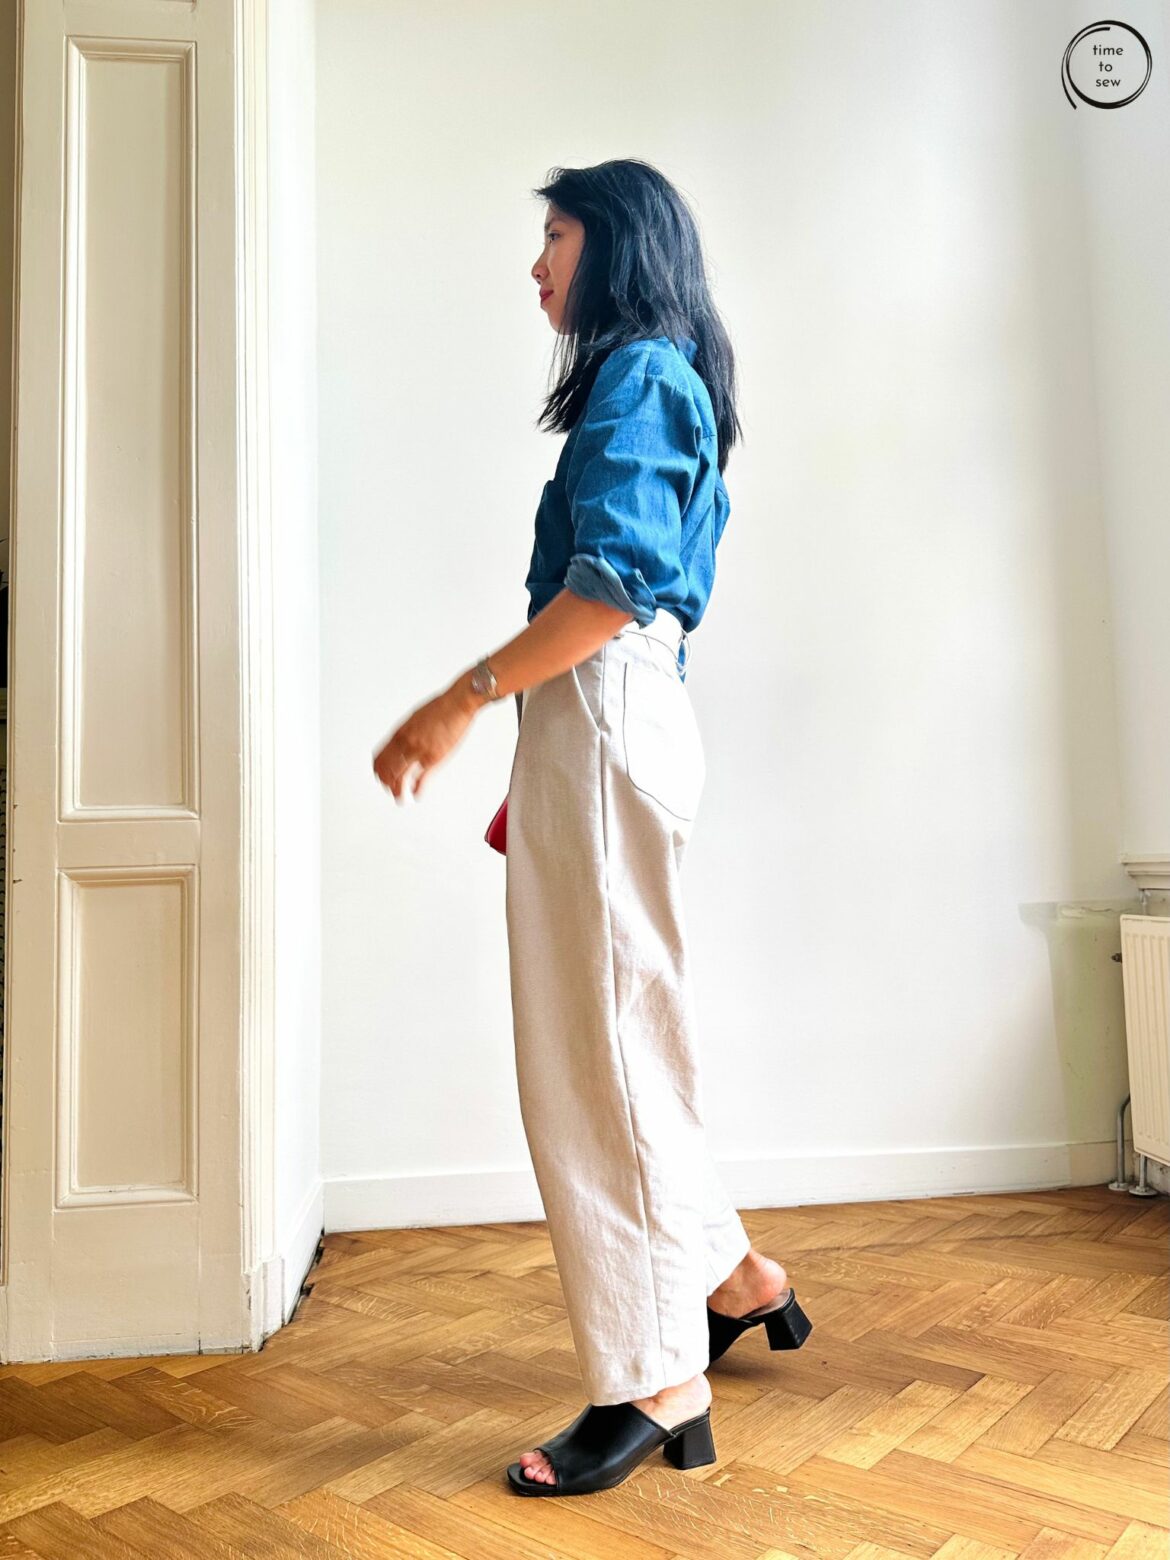
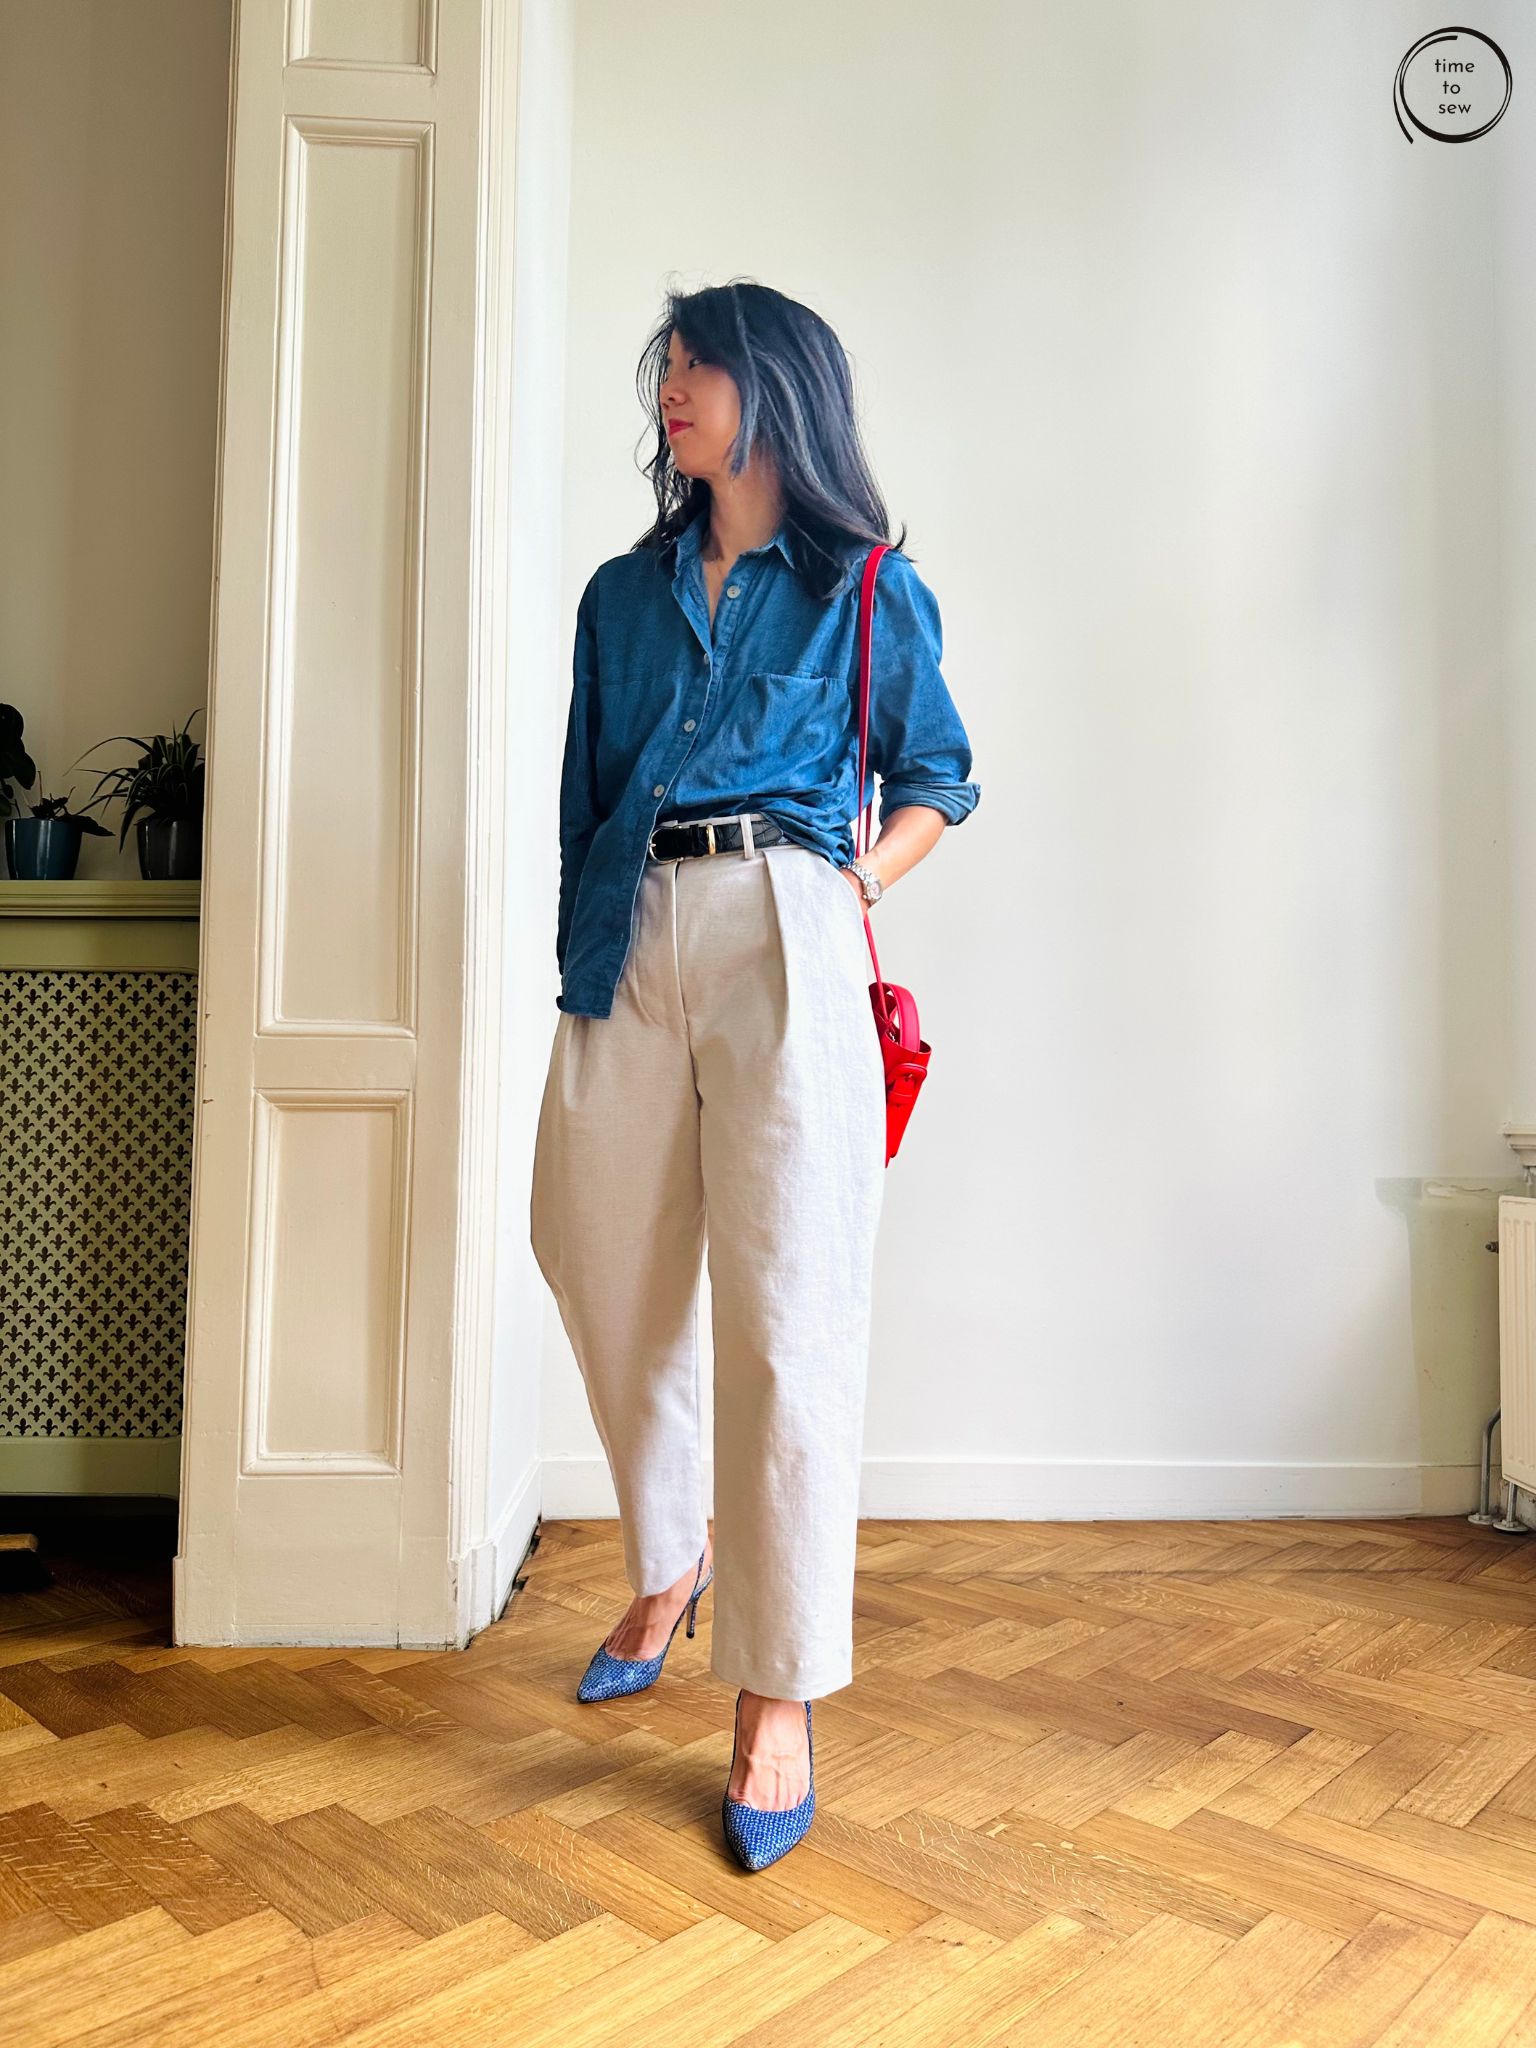
- Length is good, not too cropped. FYI I’m 164cm with legs longer than my body.
- Check that your pleat is going the right way! Luckily Nita Jane pointed it out to me before it was too late, but it does really affect the look and shape of the pant.
- Grading out at the waist … it was tempting just to let out the pleat a bit for a fast result but Nita Jane said I should add a bit at the side seams and leave the pleat alone. Since she made the pattern I listened to the advice!
- 4cm ease at the waist.
Fabric choice
Grey stretch denim from my stash, bought it in person locally. It feels quite hefty with quite a bit of stretch and bounce, so it didn’t like to press super flat too easily (you can see what I mean by looking at the back darts in the photo). I thought the fabric would work as I was keen to show off the leg shaping and it did, but to be honest I’d prefer something a bit less stiff. Have seen the Terra pant also made in wool and linen, so I think as long as there is some body and structure and is weighty enough, anything goes. Hashtag is #Terrapants on Instagram.
Choosing a size for the Terra pant
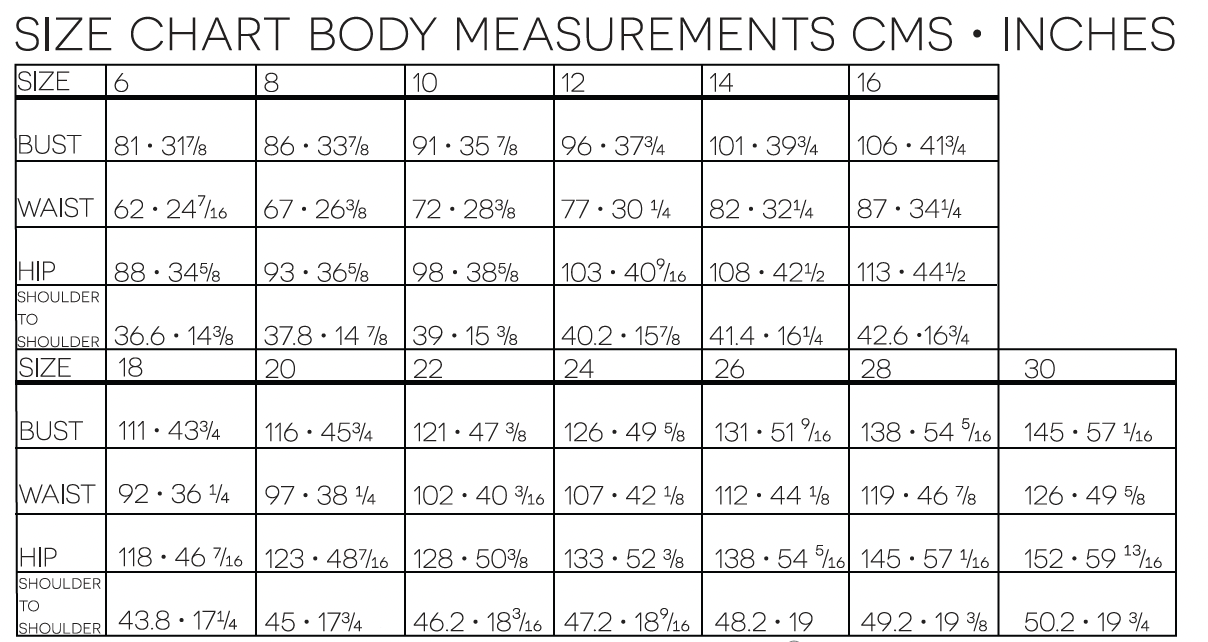
I made size 6, grading to 8 at the waist. For reference, my measurements are W71, H92, which put me on the size chart between 8-10 at the waist, and 8 for the hip.
So why on earth did I go with a 6? Well, mostly just unscientific intuition. Even if sewing sizing is not RTW sizing, my gut told me I don’t ever wear size 10 in RTW. Additionally, I have hang-ups about my waist being usually 2 sizes bigger than the rest of me on any sewing / RTW size charts which gives me an (usually) unfounded fear of not having enough ease. So I have a tendency to size up. A pattern-maker friend said to me recently “stop making clothes that are too big for you!” I think might be proportion-related. I am a pretty thin person with small bones, so clothes often just “look” bigger on me than someone with the same measurements but is differently proportioned.
Top Down Centre Out (TDCO)
This is the second time I tried TDCO, which is a trouser fitting method that typically involves a one-legged toile and a waistband. To learn more, please go to Ruth and Stacey for very detailed resources and literal hours of content.
Now I have made the same adjustments to trousers for years and normally made 2 legged toiles, so I was curious to see how TDCO would work. My typical adjustments: a bit off the back inseam + take in at the hip (thin thighs). Grade out at the waist (thick waistline). A bit off the top of the back crotch (flat butt) tapering to nothing at the side seams.
Conclusion: TDCO is much quicker than a full toile (for me) and is super handy for a quick fit check. I use the term “quick fit check” deliberately since I’m not deeply into achieving perfect fit. I found that I did the same adjustments as usual with TDCO, but it was easier to see quickly how many cm’s I needed to take out everywhere. In this case, I pinned out 4cm from each side at the hip, and took 2cm off the back crotch. I could have tightened up the waistband by 1-2 cm for a more defined waistline but I must say I feel very comfortable sitting and eating with a slightly looser waistband!
Top Down Centre Out – what I did
- The Terra pant has a straight waistband, so I just used one I sewed up previously as a template. And I use this on all the pants patterns I have with a straight waistband! Here I sew (with contrasting thread) the CF, CB. And 1cm all the way around the bottom (since the patterns I use typically have a 1cm seam allowance).
- Cut and sew the pieces for one leg. TDCO advises adding extra seam allowances everywhere to the leg pieces in case you need to let things out. But since I’m always pinning away fabric, this is not needed for me and I save time drawing in the sewing lines had I added the extra seam allowance.
- First pin the leg to the waistband between CB and side seam. Then put on the waistband / leg, pin together CFs on both ends. Pin the rest of the leg to the waistband using contrast stitching on your waistband as a guide.
- Draw in the back pockets! If the placement is off then I just pin on the paper piece in different places until it looks ok. Lazy person’s way.
- Make your adjustments. The great thing about TDCO is that you can see immediately what one change does to the rest of the leg because it is already hanging on your body. And you only need one leg! TDCO recommends 2 mirrors to properly see everything but I have only 1 and TBH that’s good enough for me.
Finally, I use old bedsheets / curtains / calico so I can easily draw in lines with pencil, helps with the pinning. Using bedsheets and calico is inferior to using fabric that is close to your fashion fabric. If you’ve ever made trousers with e.g. linen and again in thick cotton twill you’ll know the result and fit is a bit different. But as I said before, I’m not deeply into perfect fit. If I compare all the high-waisted trousers I own I guarantee the waist sizing is different for each and I wear them all. So in the interest of using what I have, bedsheets it is!
Terra pant construction and sewing
For me these are pants with “standard” construction, i.e. having made and edited instructions for many pairs of pants patterns I had no surprises. There are several ways to sew the techniques involved in making pants and you just need to choose what you like best (i.e. check Youtube or google and try it all out). I don’t comment on instruction “quality” because having seen many compliments and complaints on many brands, my conclusion is that everyone absorbs information differently and what works for one does not work for another.
What I did for the innards was “my” standard:
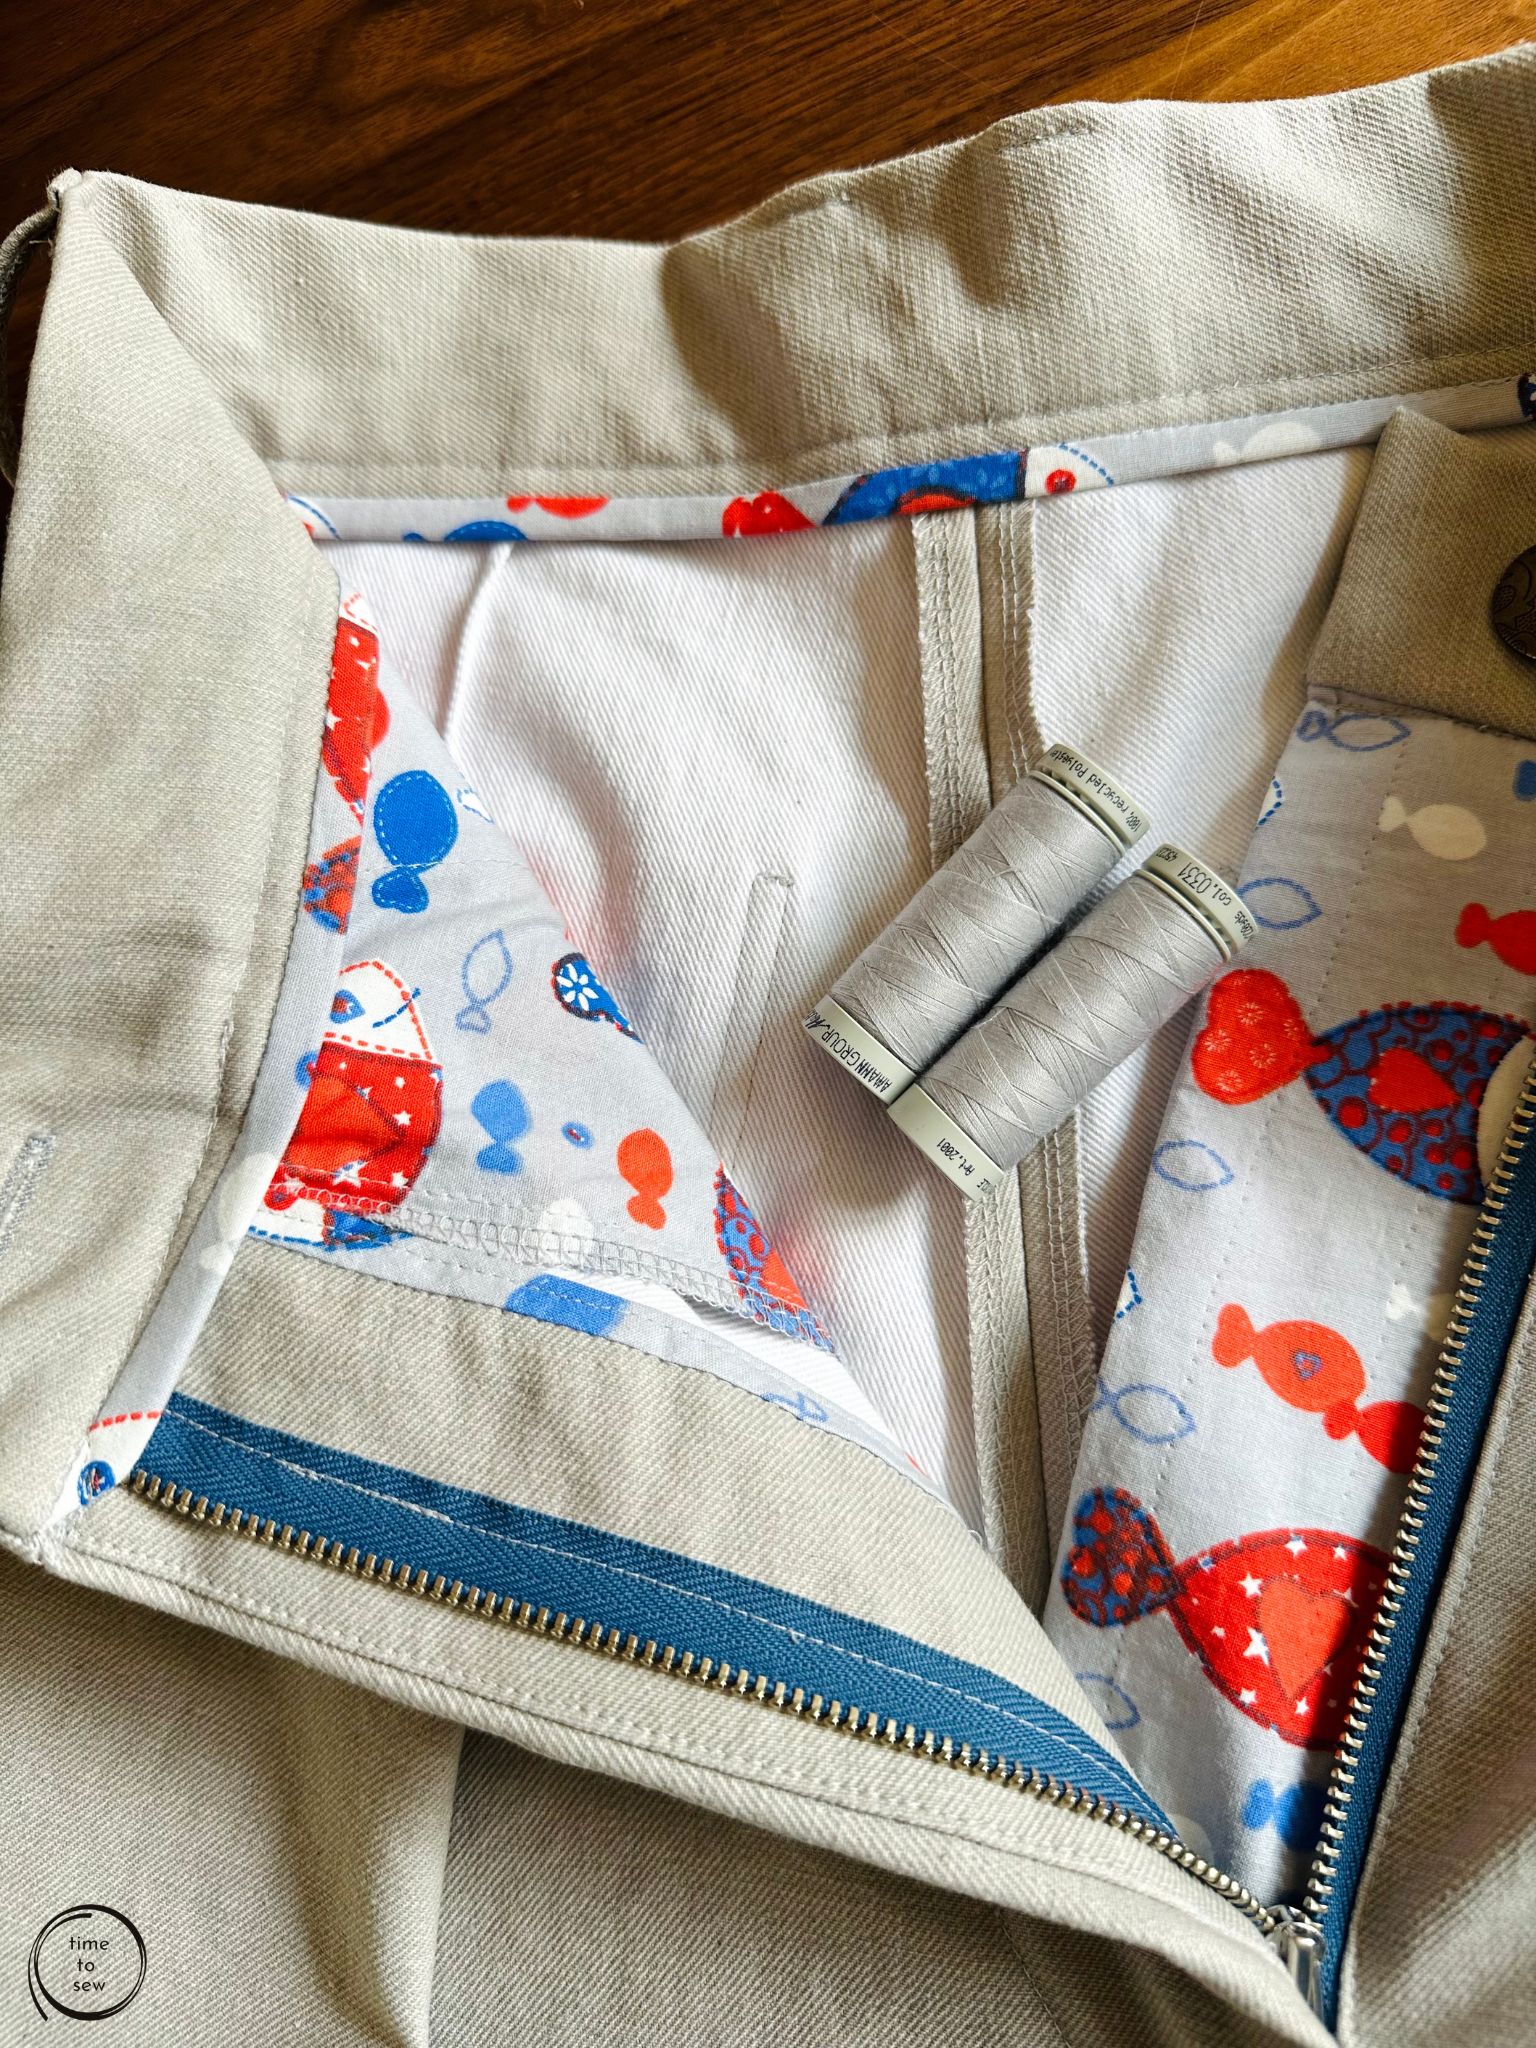
- Buy the correct length zip, in this case 18cm – I really dislike having to shorten zips. Metal ones look fancier than plastic but finding ones without chunky pulls can be a challenge.
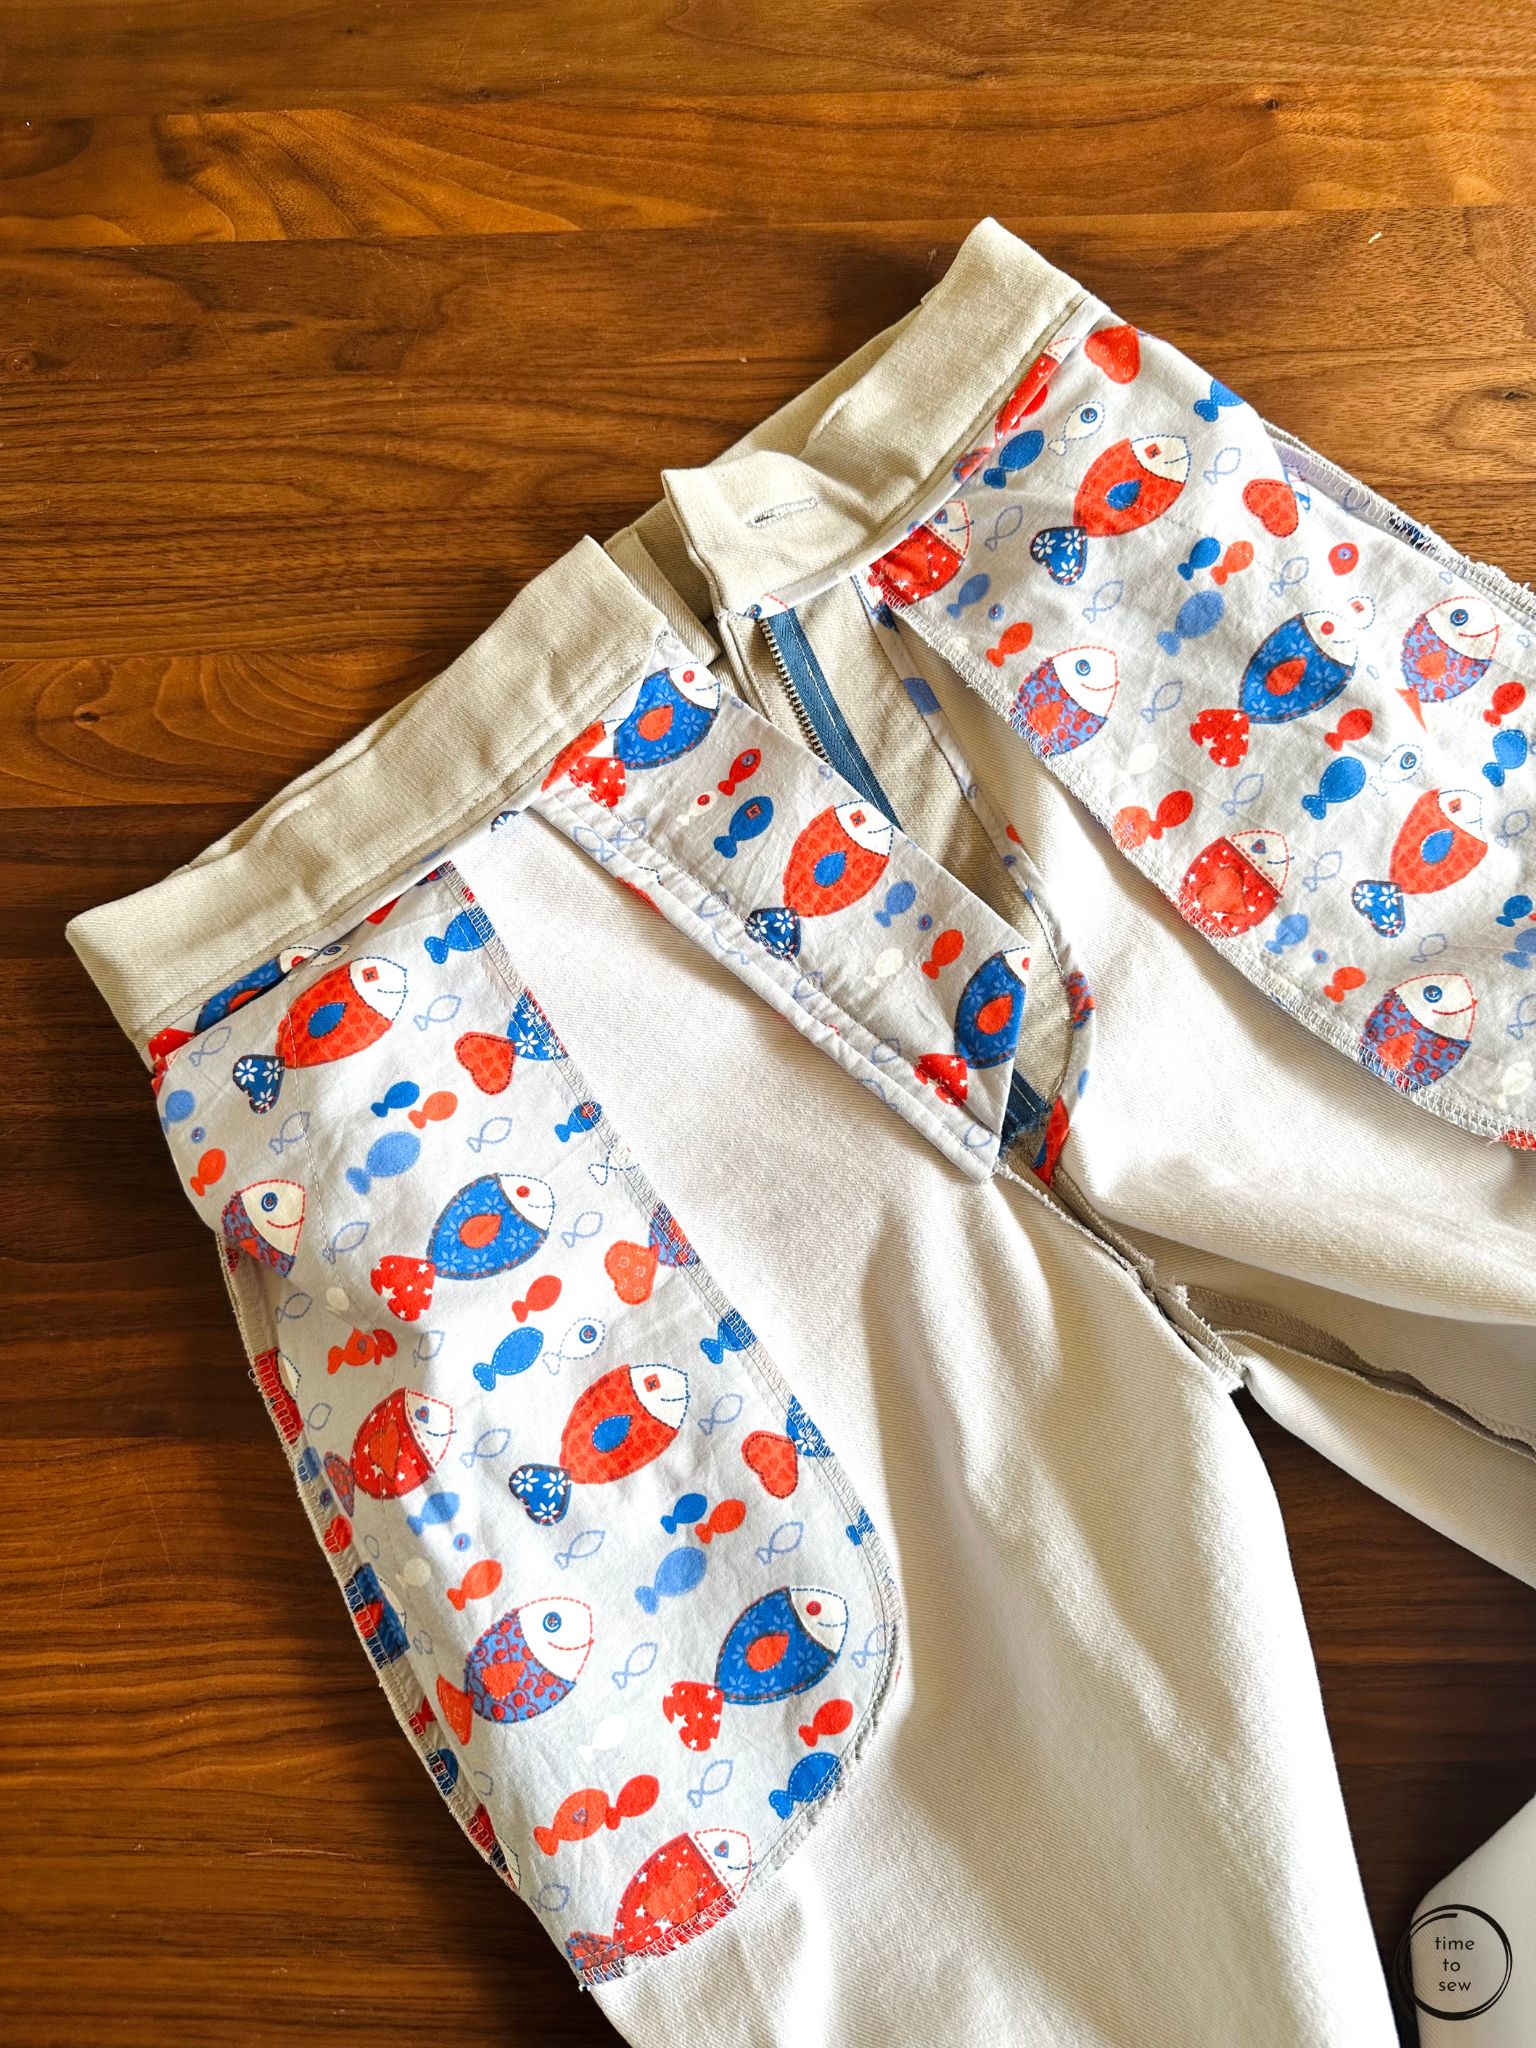
- Use some random leftover cotton for the pockets. The fish were leftover from shorts I made for my kids!
- Bind the inner edge of the waistband so it matches the pocket. Bind the fly facing.
- Make the fly shield from the same pocket cotton to reduce bulk (a tip I picked up from Diane – she’s a great sewist, go check her out!)
Final thoughts: how hard is it to make and fit non-elastic waist pants?
People have asked me about this often – zip fly is hard, fitting is hard, or they feel intimidated. Or the waistband doesn’t work well (fit: curved vs straight, or they prefer elastic somewhere for comfort). IMO it’s like learning to bake complicated stuff like a chiffon cake or macarons. It takes practise and experimentation to get a good result and it’s probably not going to be the first thing you try and bake. In a similar vein, I’d suggest once you have a few sewing projects under your belt, just try it out! The Terra is a good pattern and TDCO is a good method, I can easily recommend both.
There’s probably more that I can say but I’m going to stop here … hope that was helpful and if you got this far, thanks for reading! I’ll leave you here with a video that shows you how the Terra pant looks in motion. If you want to read more about pants I blogged before about a different pattern here.
Till next time
Kate x