
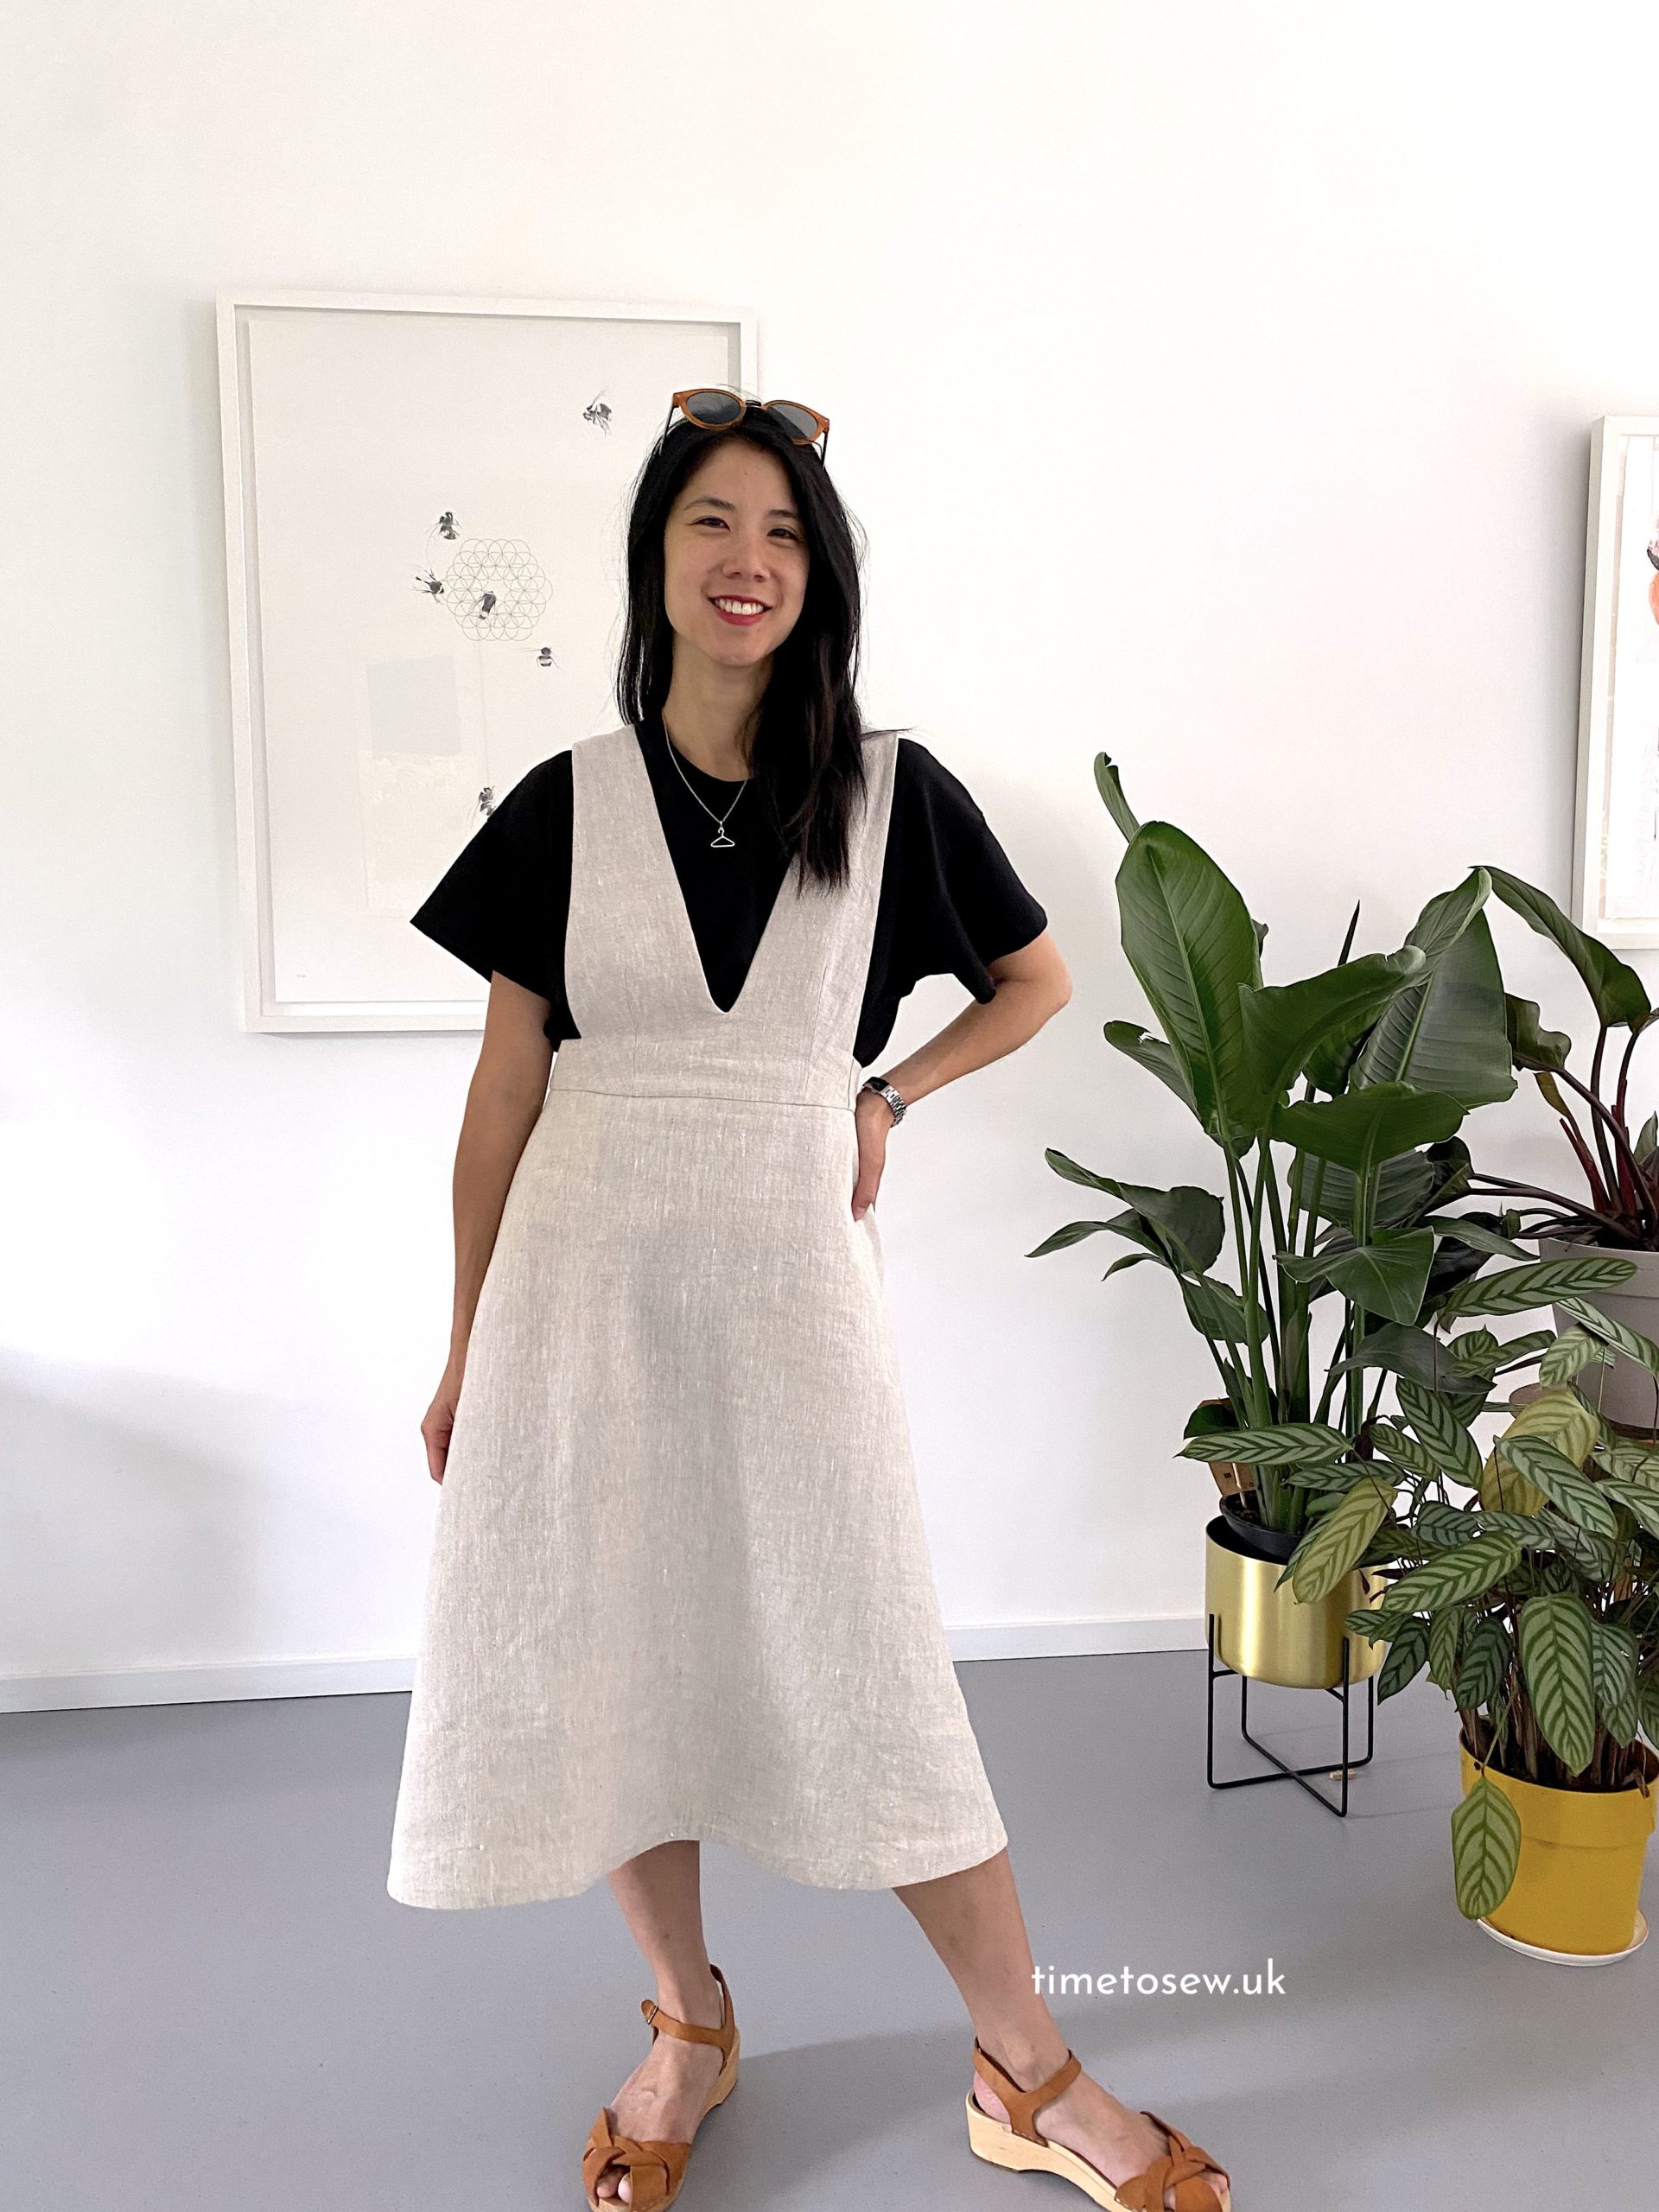
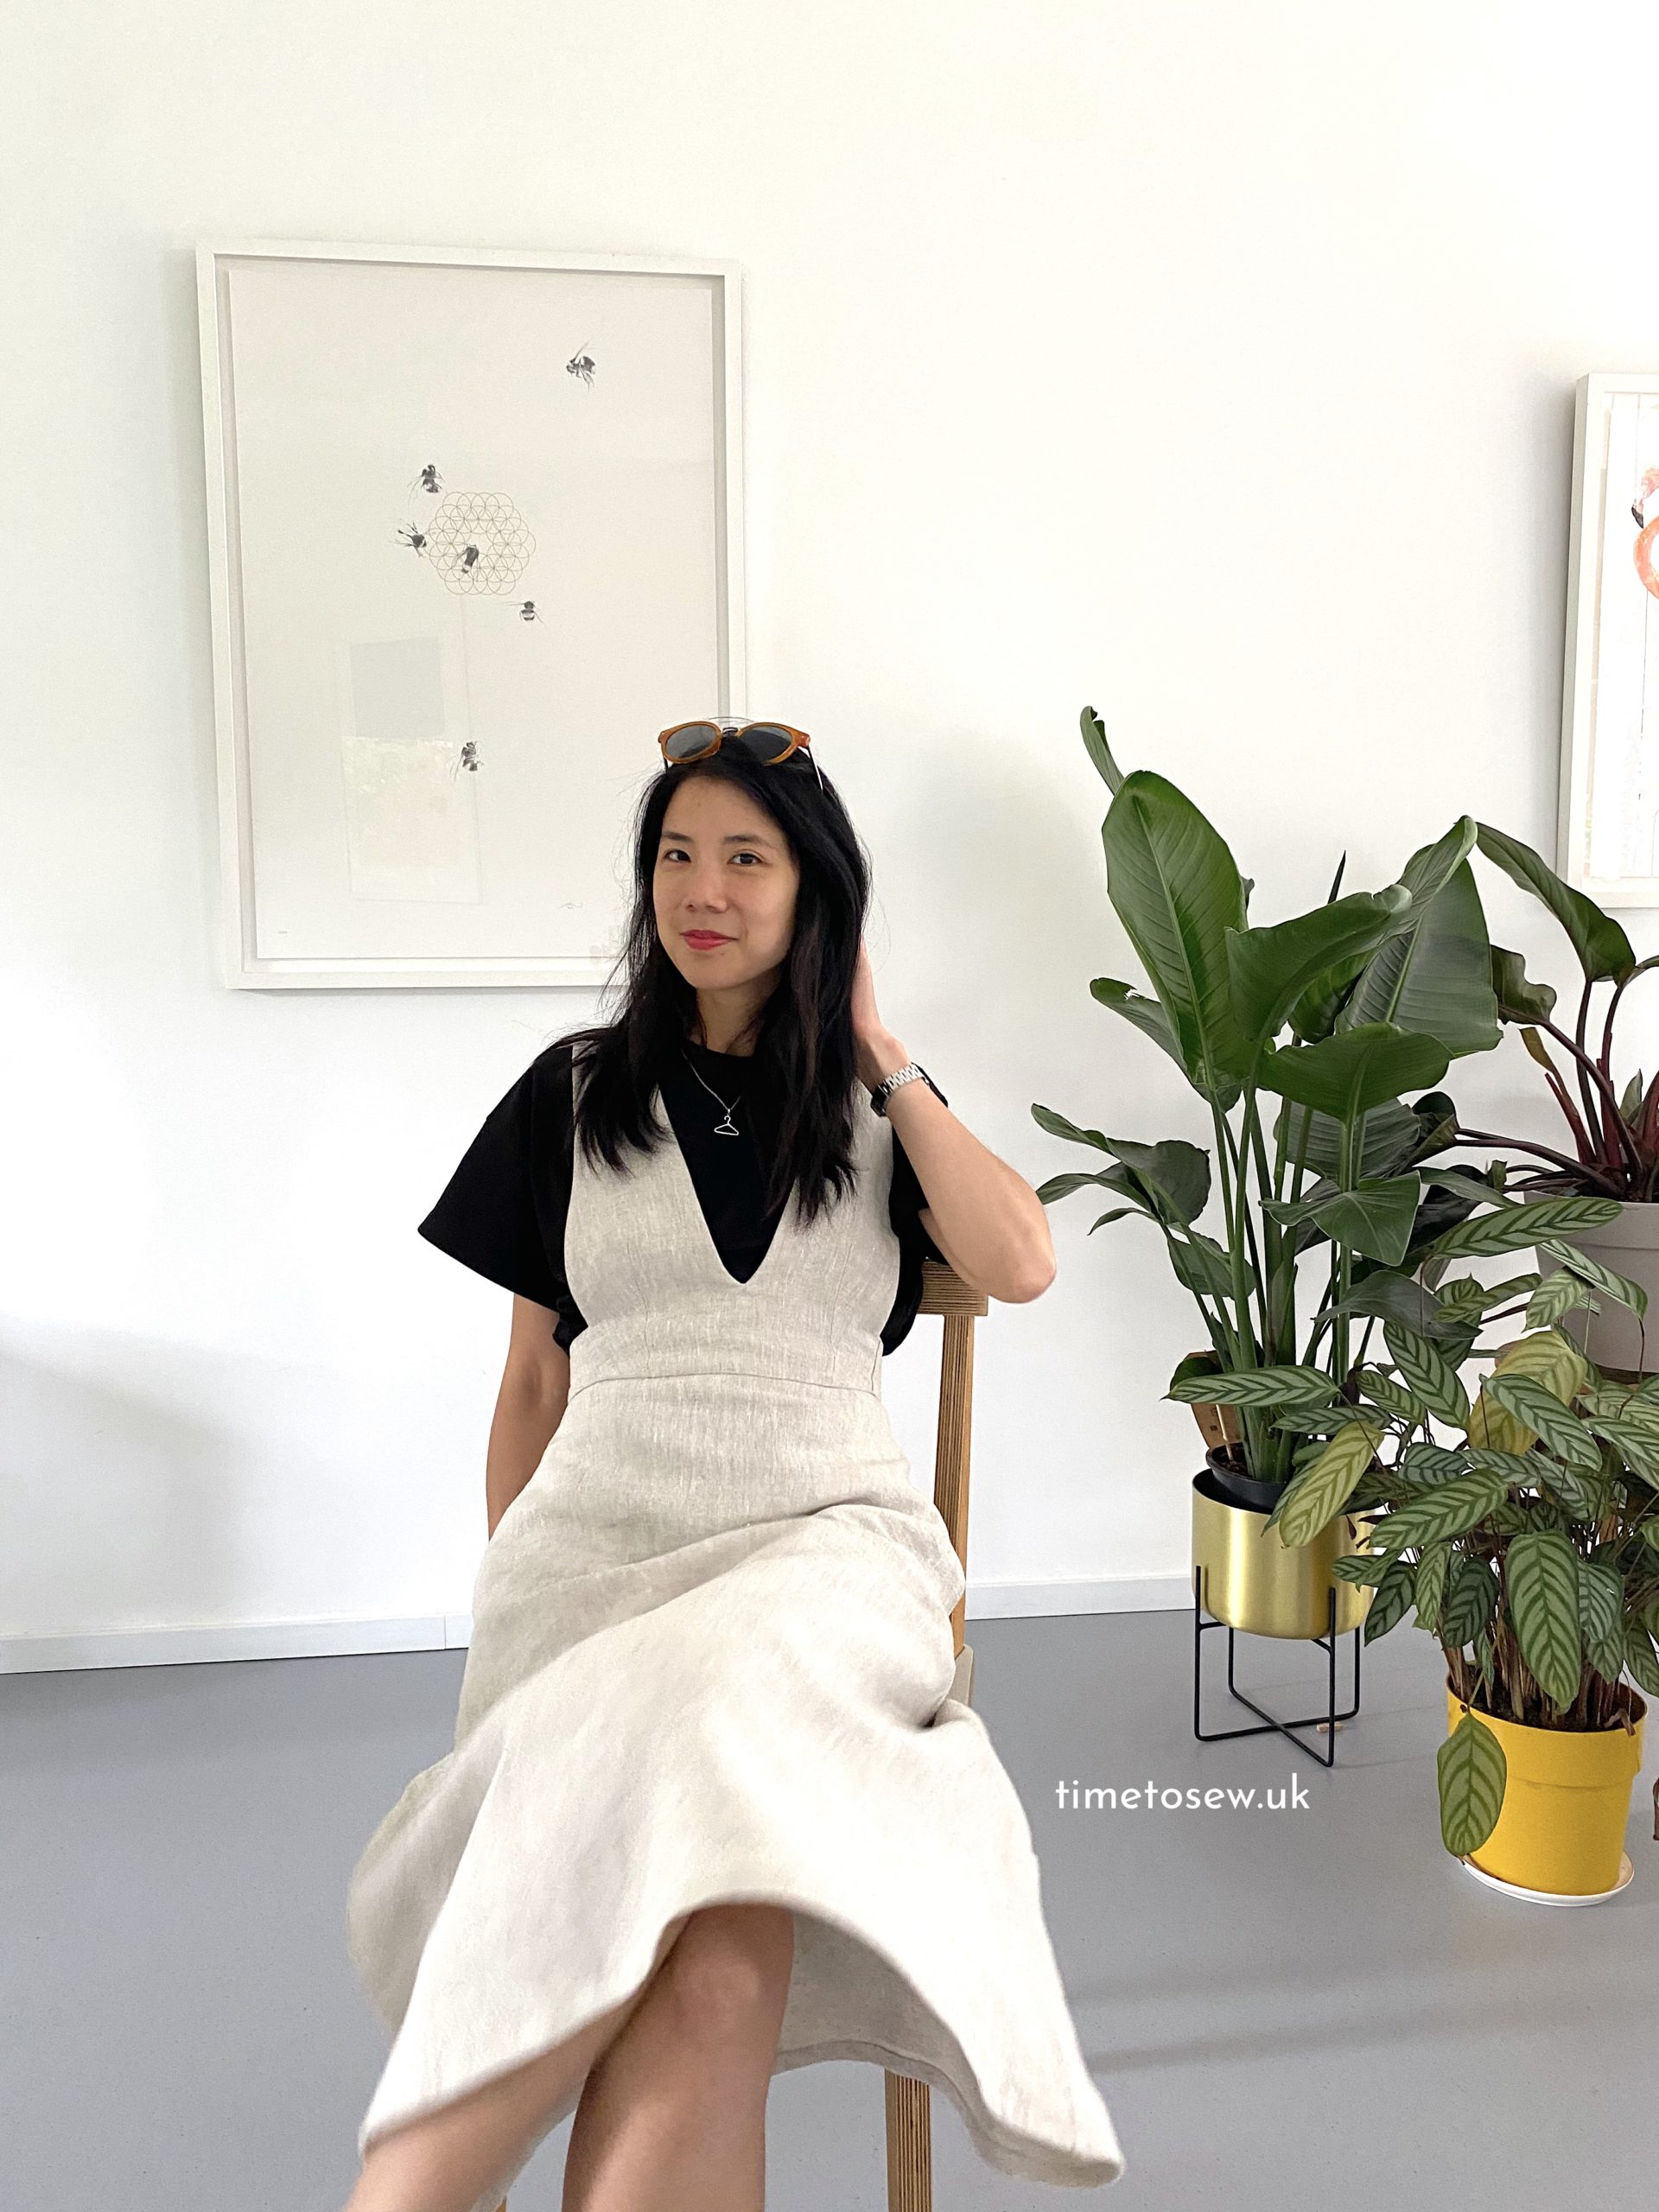
The Peppermint Milton pinafore is a new sewing pattern made in collaboration with Just Patterns (and it’s free! You can download it from the Peppermint website here). For once I’m a bit stumped in terms of description of this … my mister described it as “typical Just Patterns meets farm girl?” which might be as good as it gets. Can you tell I’m a pinafore newbie?!
Disclaimer: As you probably know by now I work closely with Just Patterns as the technical editor and this time was no exception. But writing this blog post and photographing my make is on a voluntary basis!
Peppermint Milton Pinafore – pattern details
General observations
I made a straight size 40 with no modifications (my measurements: B81 / W72 / H74), from memory there were no changes to the 34-46 size range post testing (there were some to the 46-60 size range) … FYI the pattern runs up to hip size 60”.
- The waist is fairly loose, assuming you will want to wear something under it. Here I am wearing my Tyra tee (also Just Patterns) which is boxy and oversized and bunches up if you want to full tuck into eg jeans. But here it works out just fine.
- You will want the waistband to be sitting in the right place on your body so check the length of the bodice. Toile is always advisable.
- A line skirt so there is good ease at the hips, but as always check the finished garment measurements.
Things I like
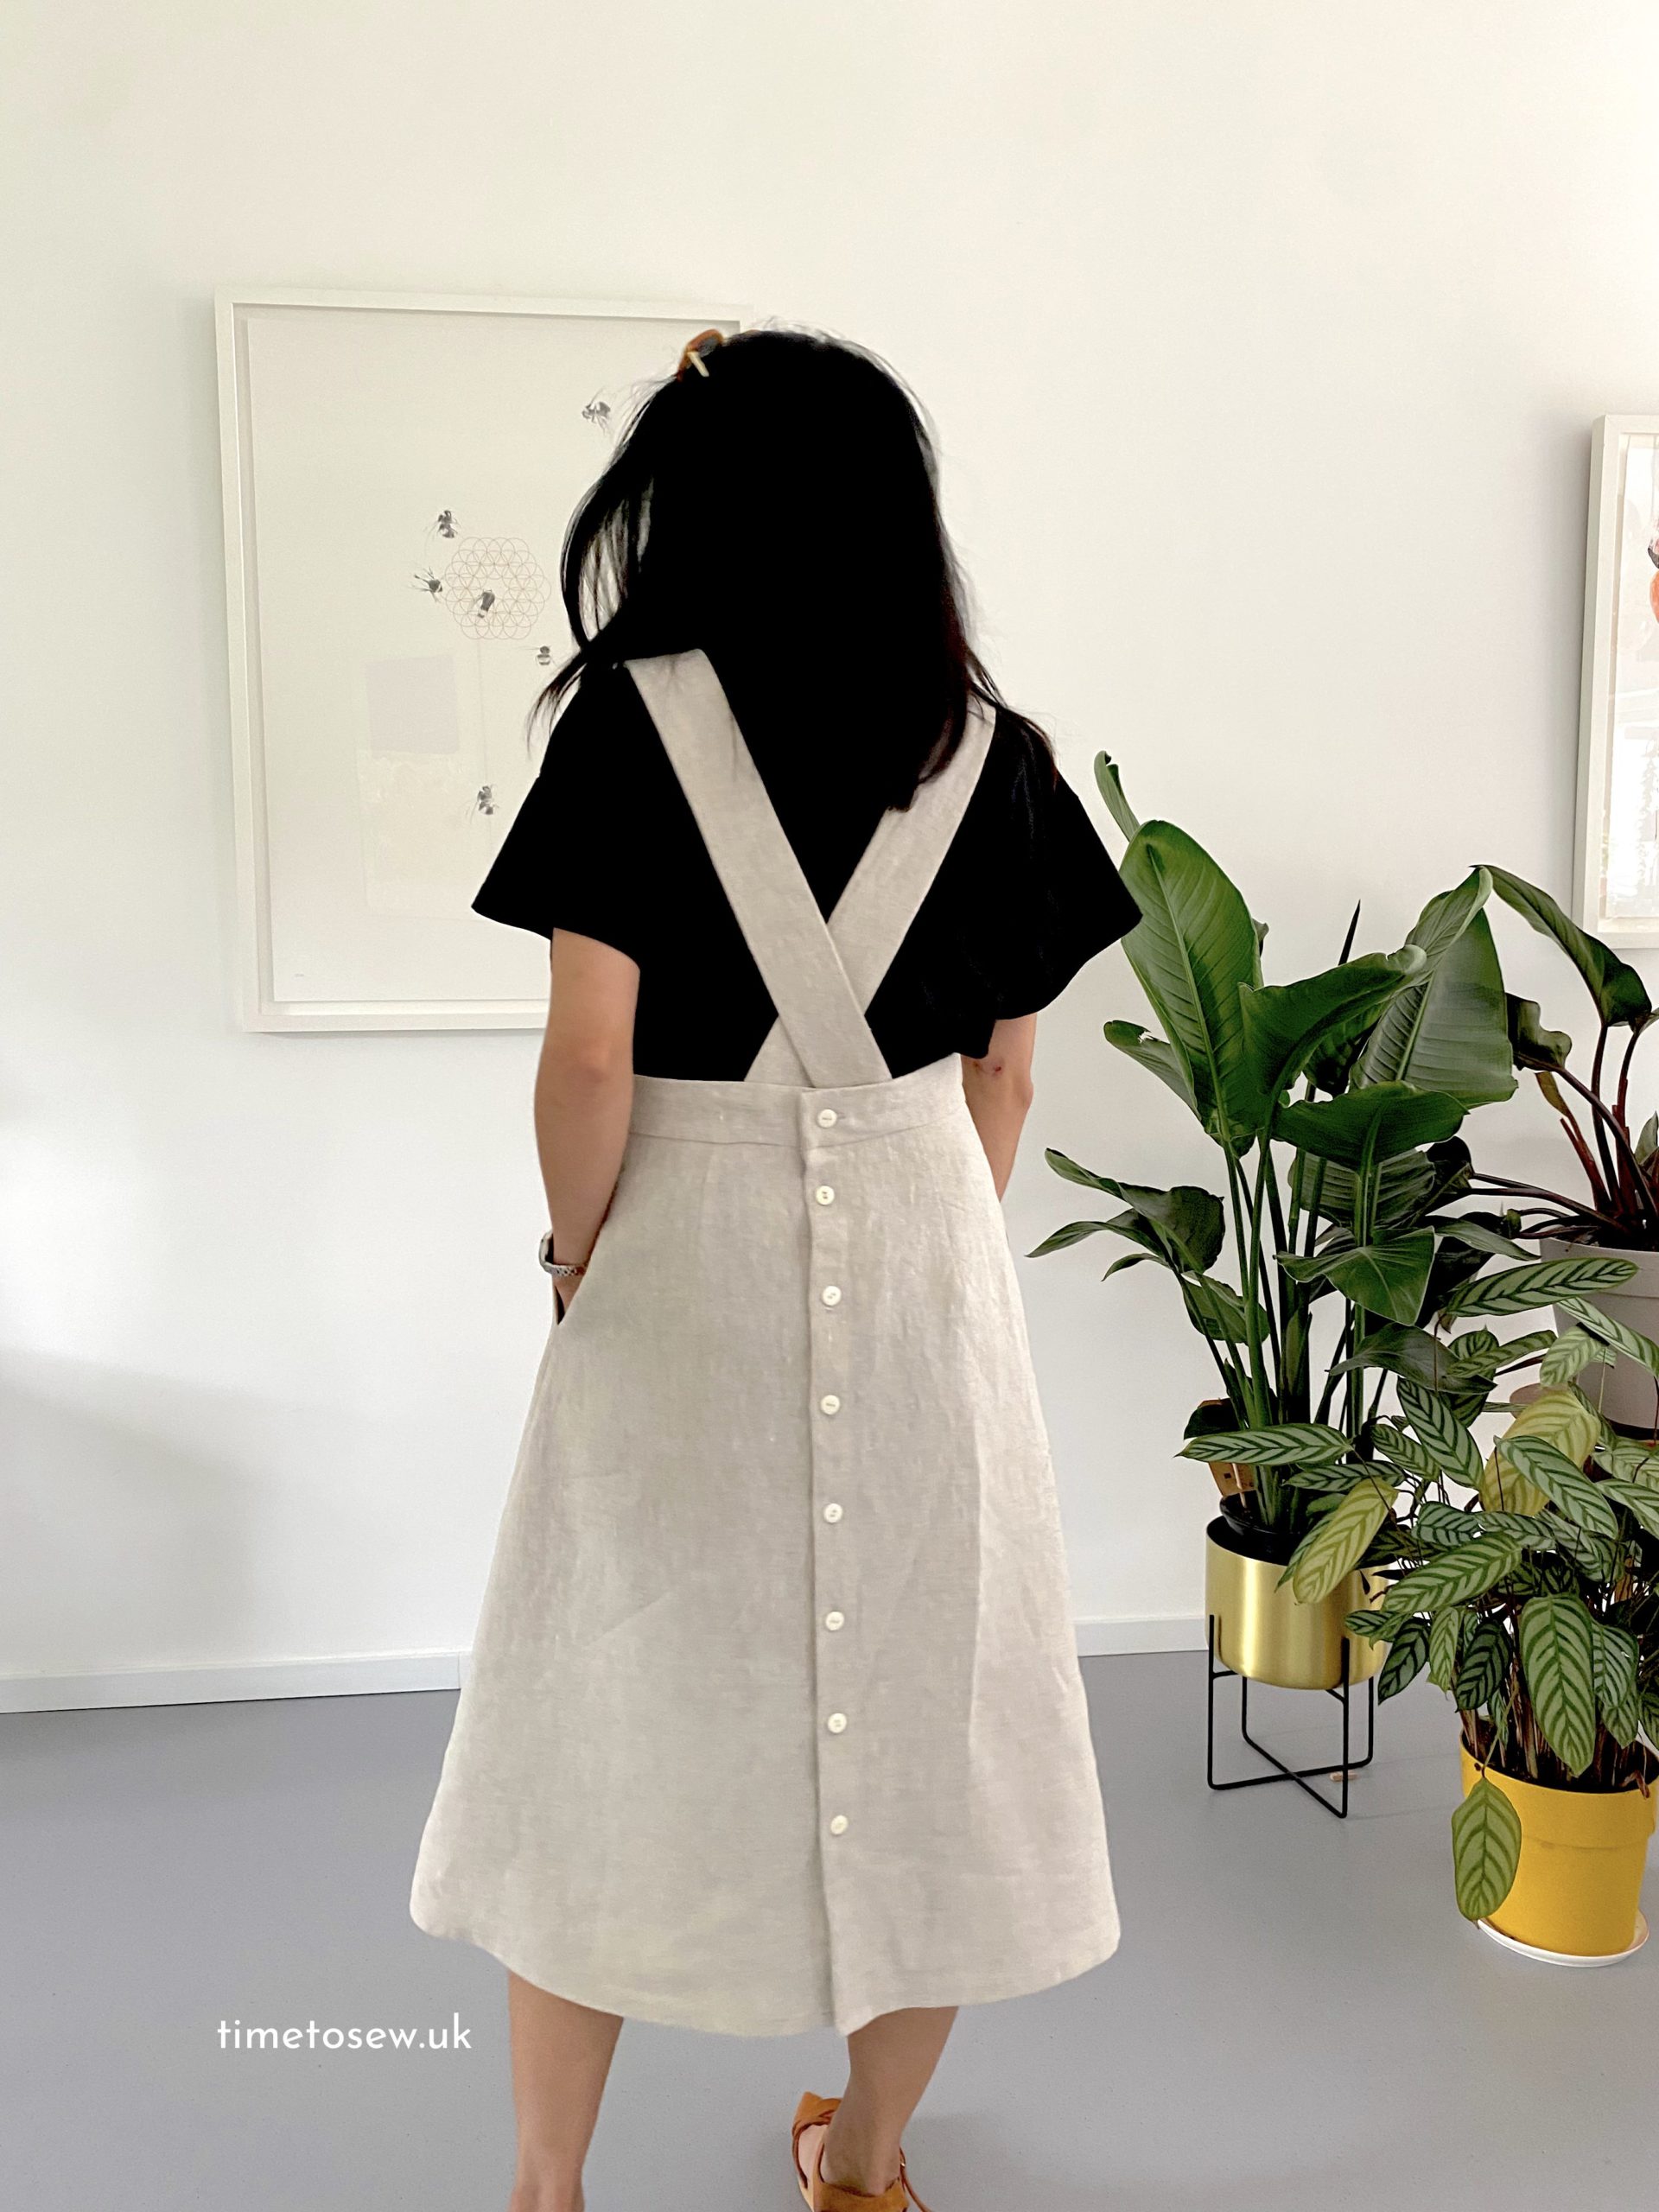
- Fully lined bodice and straps, plenty of opportunity for fun lining (or you could just use self fabric if it’s not too thick).
- Clean and tidy finishes on the inside, as typical of Just Patterns. Waistband is bound on the inside and you can make the bias tape in the same fabric as the pockets and bodice lining to get the full effect!
- Pockets. My favourite kind of side seam pocket, with an all in one pocket piece.
- Button back adds detail and interest.
- There is no elastic waist, woohoo! After this covid year of loungewear, I’m into things without elastic.

Things I like less
- There are a lot of buttons …. 12 in total. Takes awhile to make the buttonholes and sew the buttons on.
- Not sure how you feel about a button back, some people like it, some people hate it. I’m like the look of it but from a comfort perspective I’m in the neutral camp. It doesn’t bother me that much but I do have to adjust my sitting position on a regular basis so there’s no buttons jabbing my sit bones.
- As with any bottoms with a button at the waistband, there is always some pulling right at the waistband seam. This is not a pattern flaw, every piece of clothing with this kind of closure has this. To lessen the problem, I sew a hook and eye as you can see in the pic below.
Fitting note
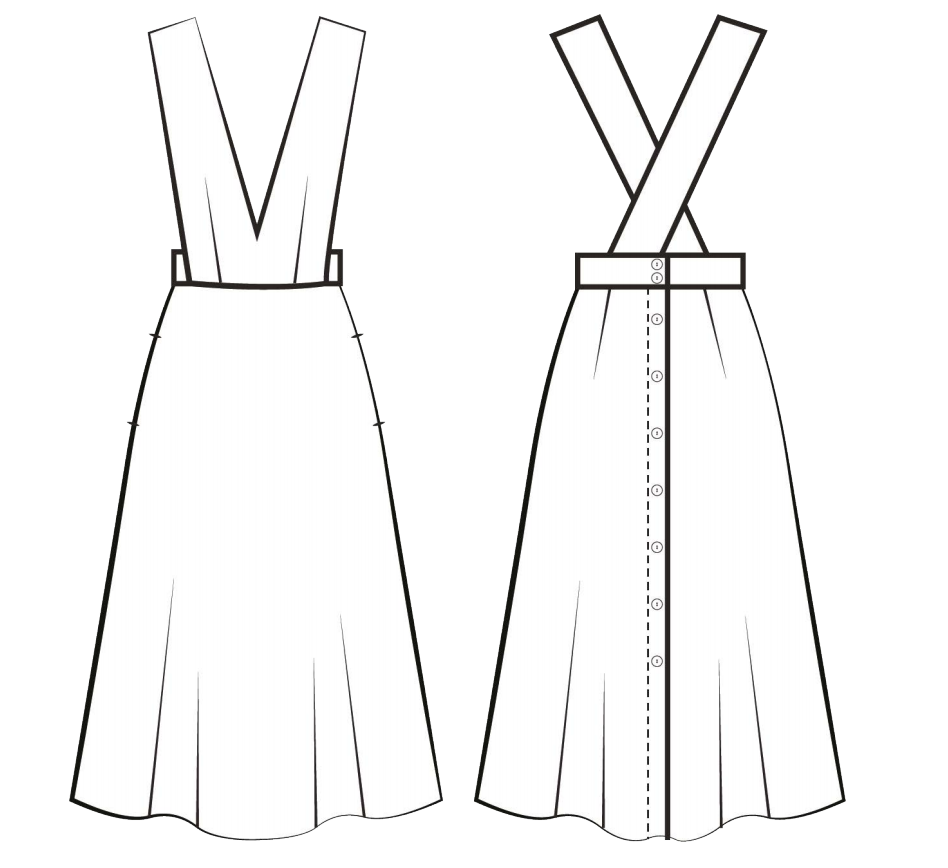
One thing I encountered that you may wish to bear in mind: The straps and front bodice need to be the right length before you start. Let me explain (and why you might want to toile this): the front bodice is one piece that runs up to the shoulder as you’d expect. Then the strap joins to the bodice at the shoulder.
Now I am a short-waisted person that often shortens bodices by 2-4cm. A quick and dirty fix for this in this pattern is to take the excess length off at the shoulder seam, i.e. slice off a little bit on the top of the strap and the bodice.
You might think an even quicker fix would just be to pull the straps tighter at the back (and therefore the buttonholes a bit further up). I tried this but then the effect is that the front of the dress lifts up, whilst the back stays where it is. So the balance is off and if you look at it from the side you will end up with a waistband that is not level.
The only thing is, the front bodice/straps are all constructed together at the beginning due to there being a lining. Therefore, this kind of adjustment should be done at the beginning, else trying to adjust the shoulder at the end will be a total pain and you may not get the tidy finish unless you unpick a lot.
Fabric choice
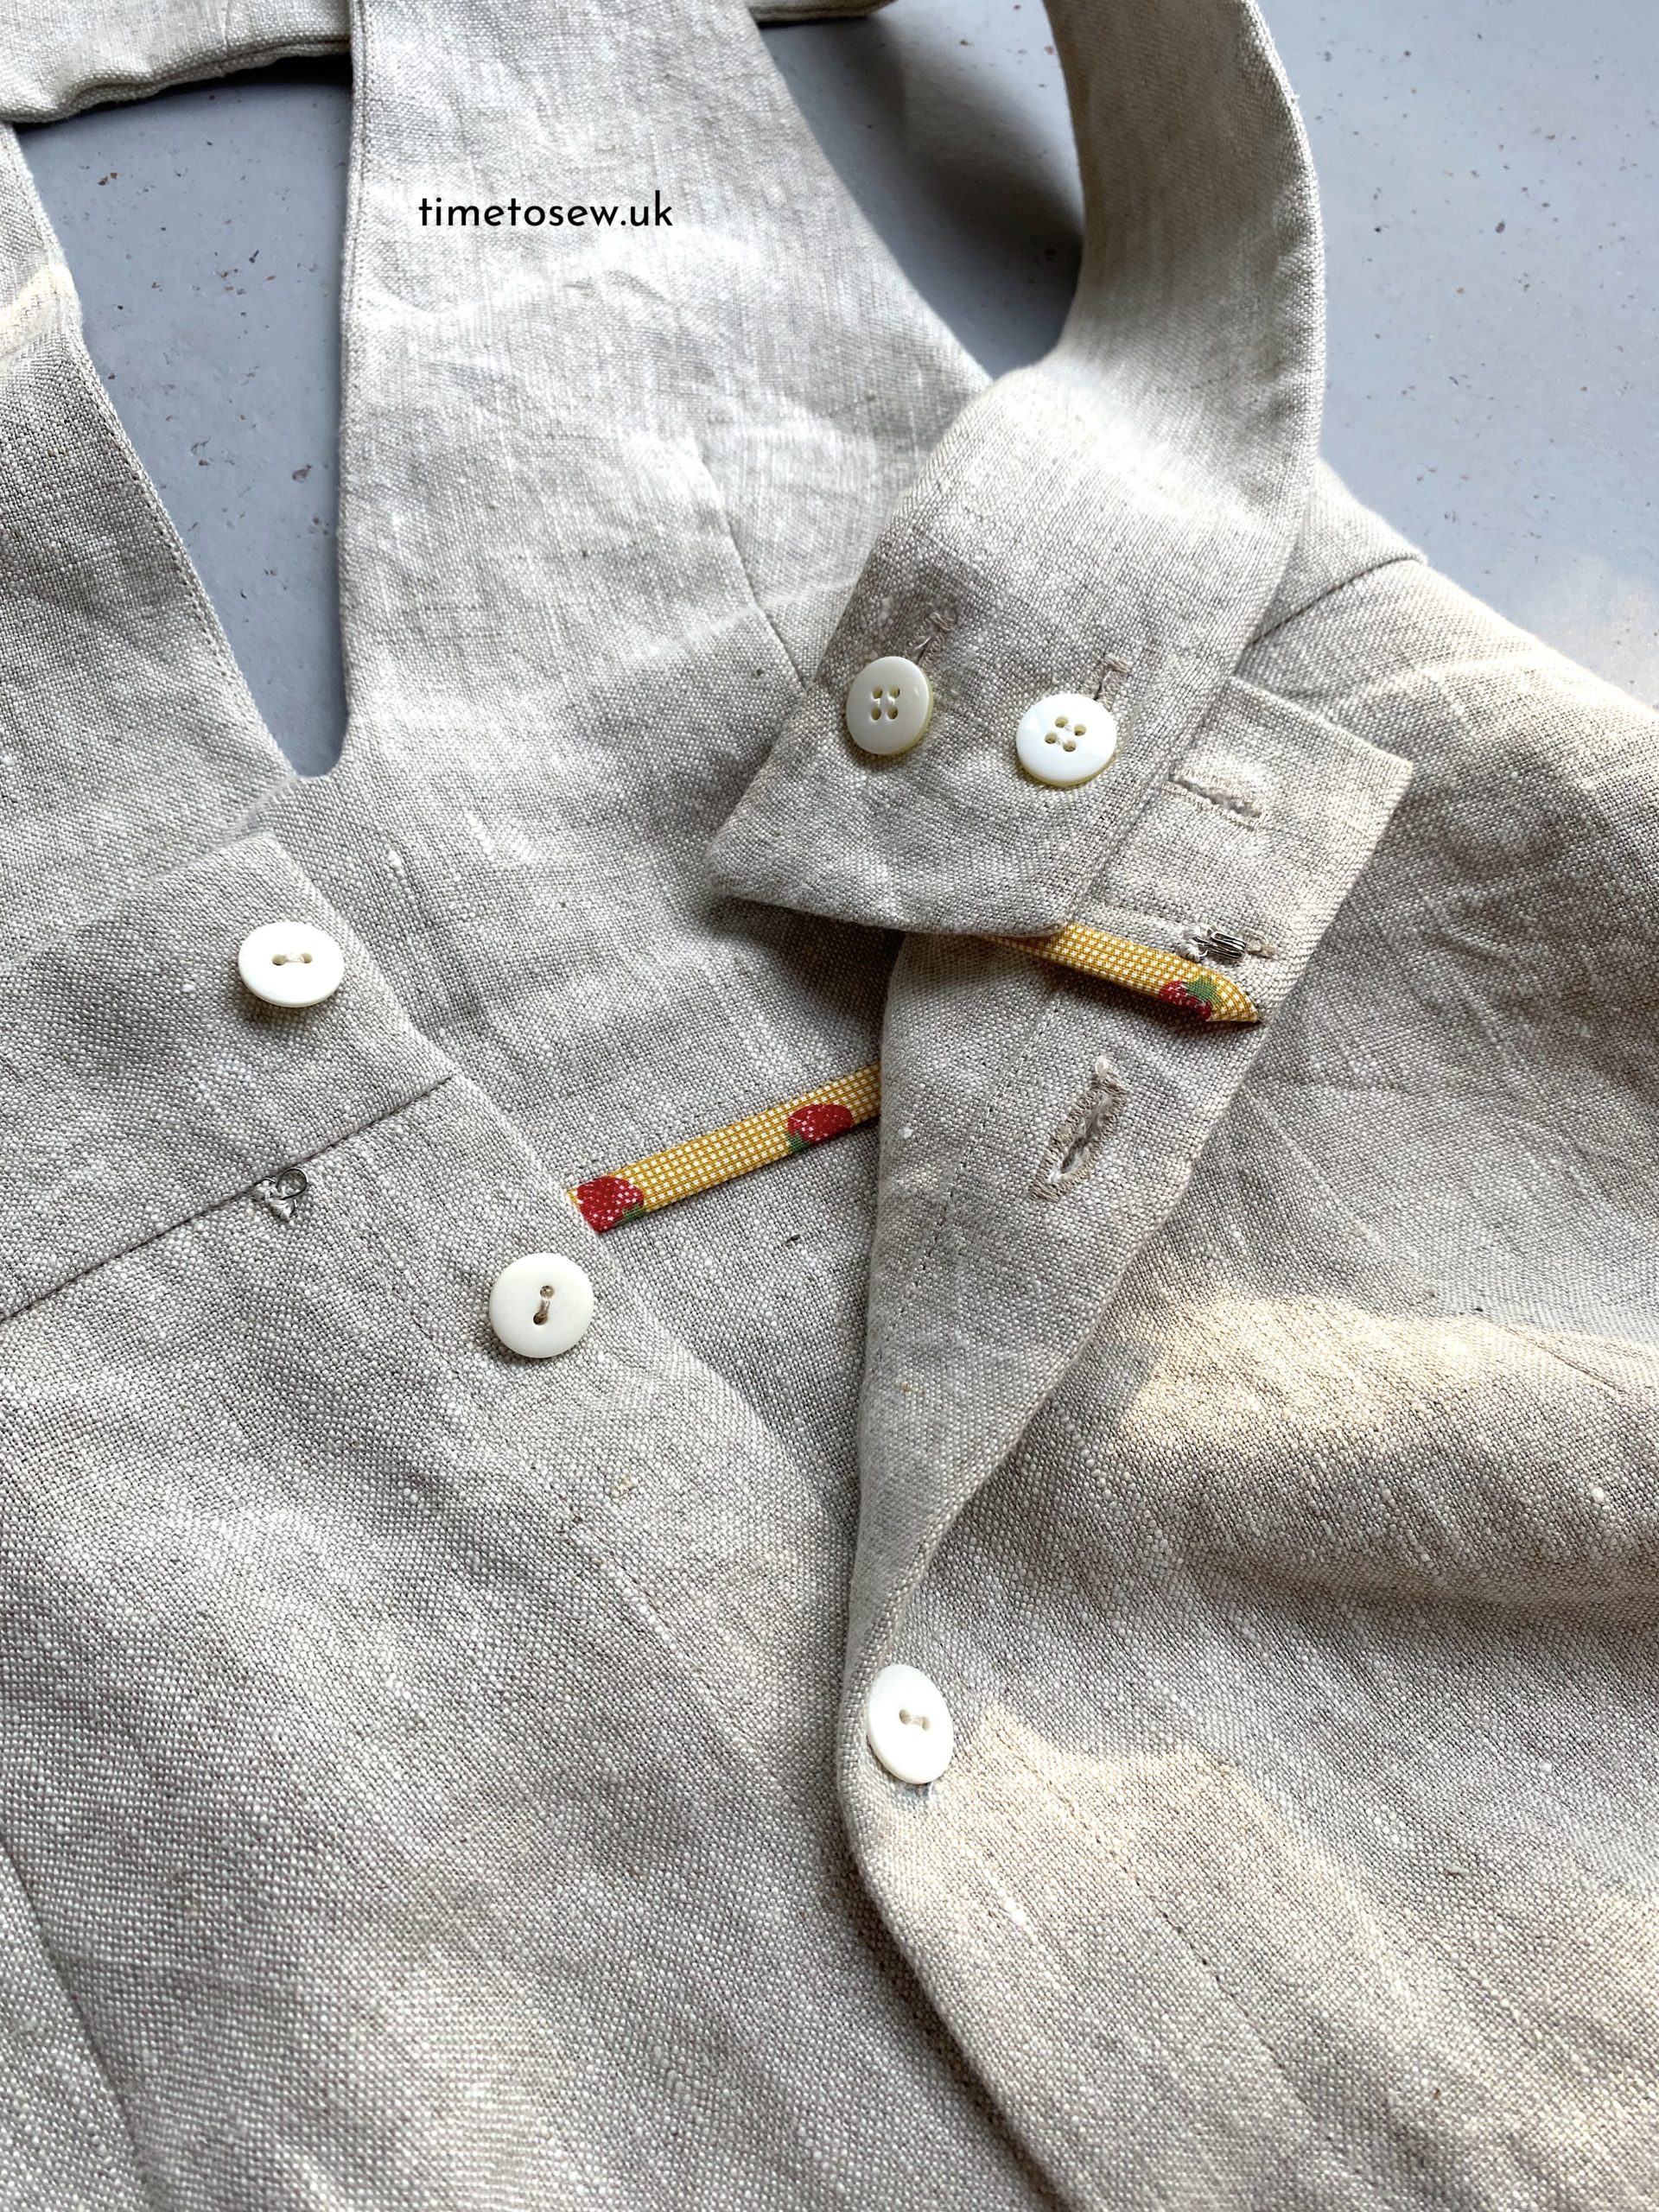
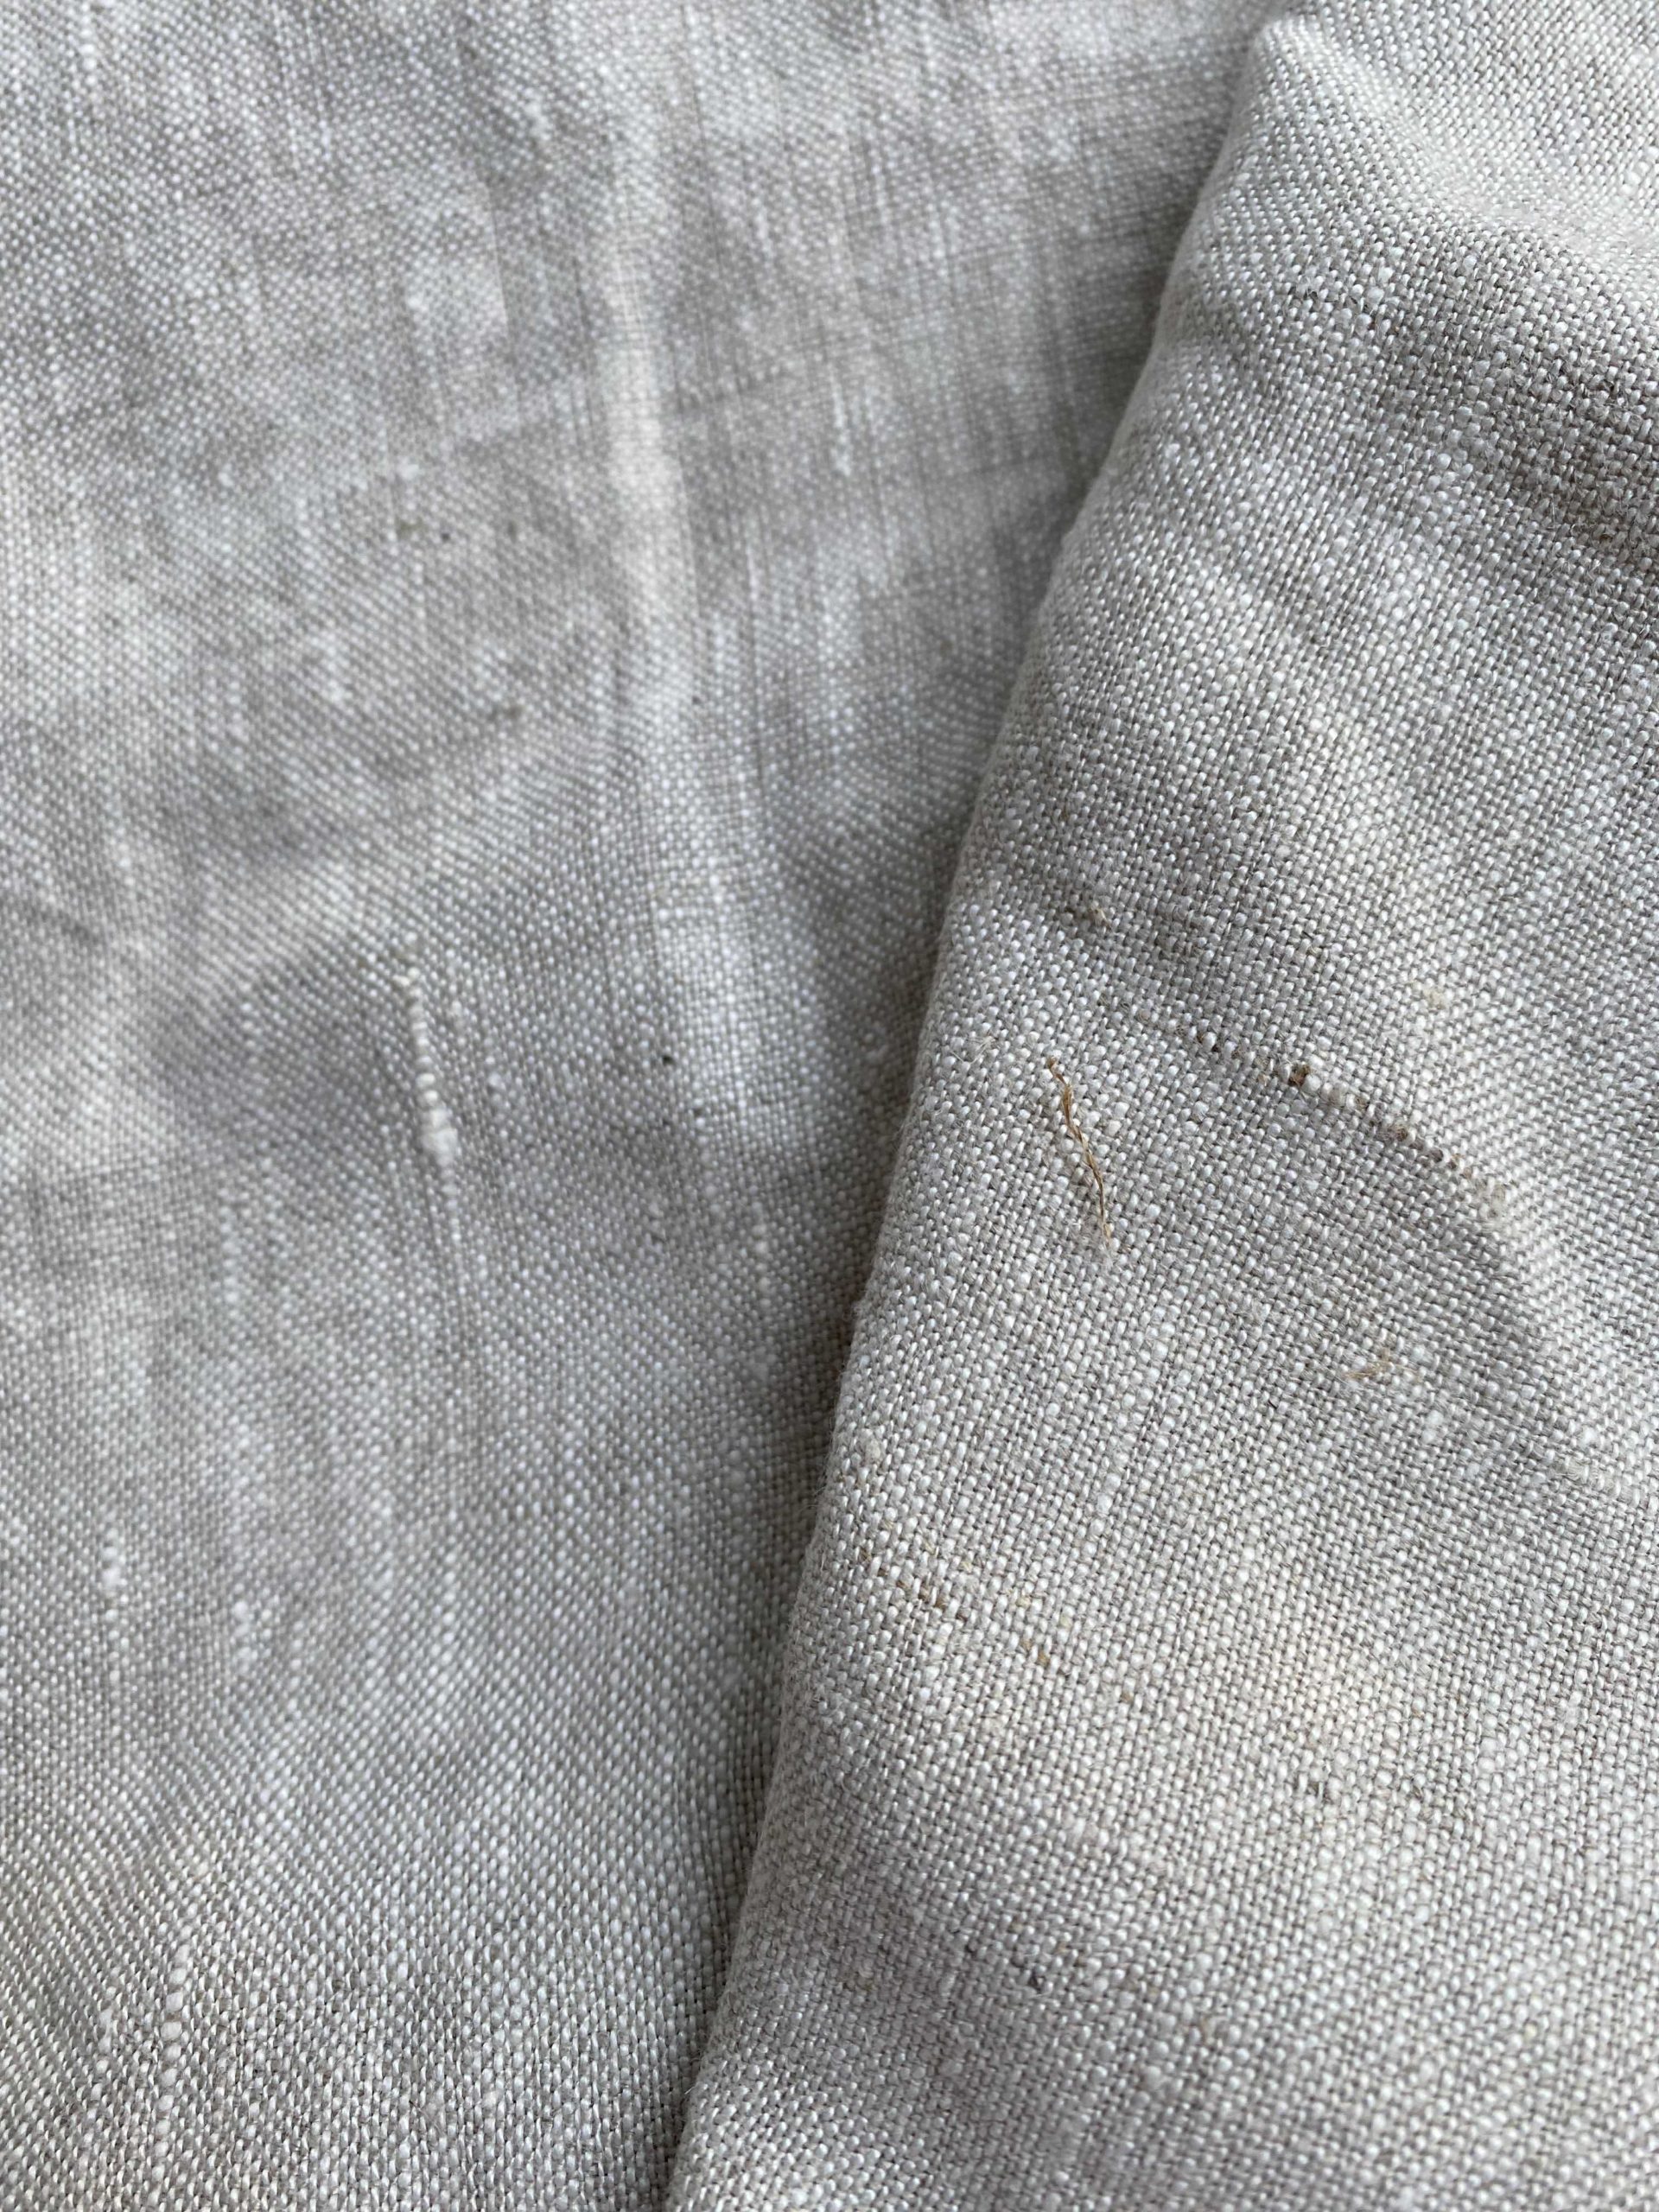
This is linen from Elizabeth Suzann in the US. I loved her brand and everything she stands for, but my goodness I am so unimpressed with the linen that I want to tell you there’s way better linen out there for a lesser price. This is the mid-weight flax colour and whilst it feels pretty weighty (which is nice), unfortunately that’s where it ends. It has so many imperfections I feel like it’s beyond “slubby”. It is not softening with washing or ironing like my other linens (after 3x washing), and I’ve even got bits of yellow stick stuck in it … have a look at the photo below where I’ve pulled out some yellow bits and also check out Leila’s review of the same fabric.
Anyway, linen is a good choice for the pinafore, and so is denim, corduroy, Kaufman Ventana twill … anything that is nice for making bottoms.
Styling
To be honest, as a pinafore-wearing newbie, I had to try on a few different things before finally settling on … the Just Patterns Tyra tee (I’ve made many, see here). Which I could have done at the beginning if I had been clever about it. The neutral colours mean I wore this to work today and felt pretty good, and yesterday when I wore it I even got a compliment!
I have another version of this cut out in denim, but with a back zip instead of the buttons. Here’s me thinking it will be more city chic and less farm girl looking, I’ll keep you posted on how that goes!
Till next time
Kate x
1 comment
Hello!
I struggled (am still struggling) to work out how the waist band is attached, would you be open to writing a post or filming a video to aid other evolving sewists?
PS: Yes I did try read the post by Just Patterns but also struggled to understand it…